Add Forms to Landings
Default SDK and Custom Forms
After uploading your landing pages to AIO (the process is described in the following guide: Upload Landings to AIO), you have two options for enabling forms: using the default SDK form or adding your own custom form.
This guide will walk you through both options.
How to Use the Default SDK Form
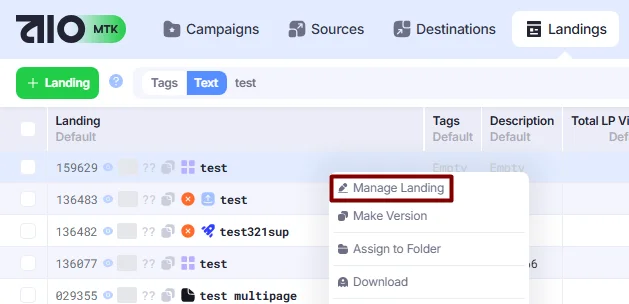
- Go to Landings. Right-click the desired landing and select Manage Landing.
- In the Code section, add the
{{form}}tag where you want the form to appear in your index.html.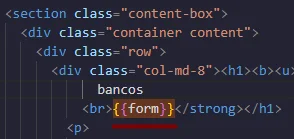
{{form}} tag on the landing page. - Click the Save button.
AIO SDK form will be automatically rendered and displayed to visitors on your landing page.
The default SDK form looks like this:
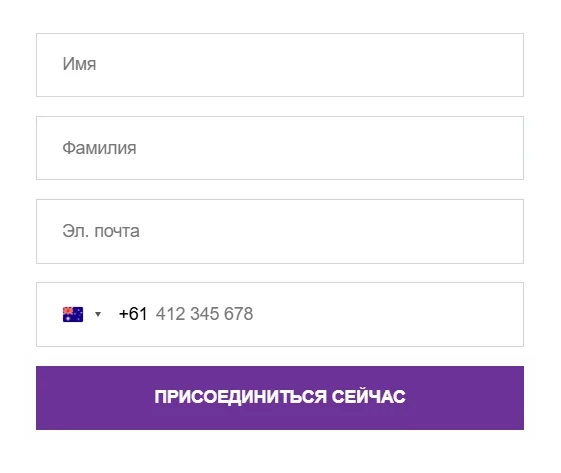
The form language is automatically selected based on the visitor’s browser language.
Validation rules:
- Email must contain an @ symbol
- Phone numbers are validated using https://intl-tel-input.com
Please note that you don’t need to add any specific push scripts to your landing page — push attempts will be triggered when a visitor fills out the form and clicks the submit button. If you already have push scripts on your landing page, please remove them to avoid conflicts.
You can also customize the SDK form to adjust its style and behavior. For more details, refer to the guide: How to Customize SDK Form.
How to Use a Custom Form
Adding Your Form to the Landing Page’s HTML
Alternatively, you can use your own form instead of the default SDK form. Simply add your form to your landing page code and pass data from your form fields to AIO visit fields via a script.
- Add your form to your landing page’s HTML — you can do this either before uploading the landing page to AIO or after.
- Go to Settings→Macros.
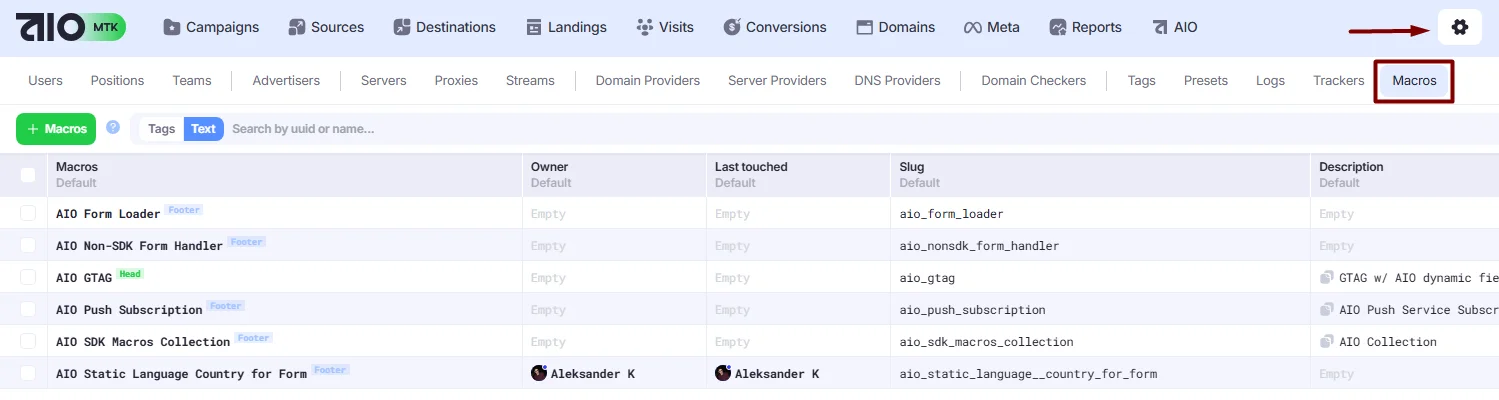
- Find the AIO Non-SDK Form Handler script and make sure it’s active.
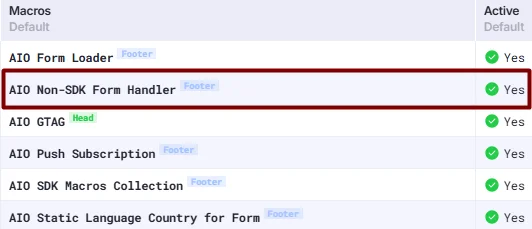
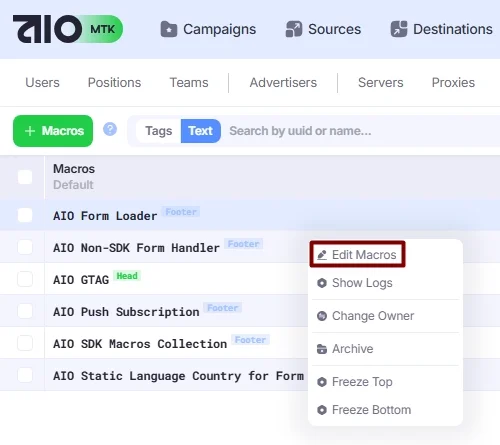
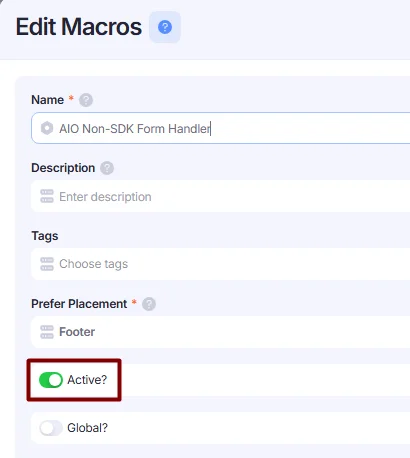
If it’s disabled, right-click the macro, select “Edit Macros,” and toggle it on to enable it.
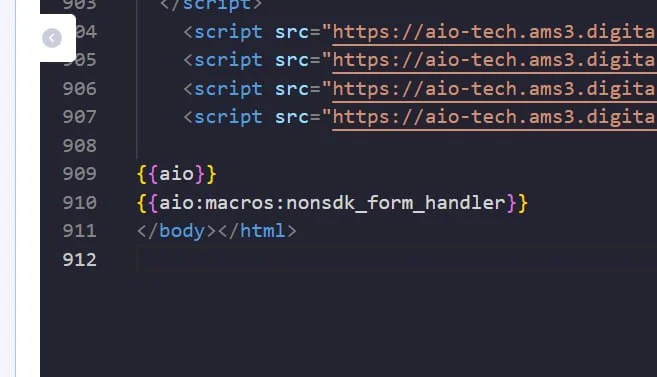
- Go to Landings. Right-click the desired landing, select “Manage Landing,” and add the
{{aio:macros:nonsdk_form_handler}}macro to your landing page. Insert it after the closing{{aio}}tag, as shown below:
- Make sure your custom form field slugs match our field slugs. To ensure data from your custom form is written correctly into AIO fields, the field slug must match its name in AIO.
Our form field slugs:
- first_name
- last_name
- phone.
- Once your form and the
{{aio:macros:nonsdk_form_handler}}macro have been added to the landing page, click “Save.”
Your form will be displayed to visitors on your landing page. When a visitor fills out the form, the lead data is automatically saved into the AIO fields via the {{aio:macros:aio_nonsdk_form_handler}} macro and will be visible in the corresponding fields in AIO.

Please note that you don’t need to add any specific push scripts to your landing page — push attempts will be triggered when a visitor fills out the form and clicks the submit button. If you already have push scripts on your landing page, please remove them to avoid conflicts.
Add Your Form in Macros
You can add your custom form (or any styles) as a macro and simply call it using its tag. The form will be automatically rendered and displayed to visitors on your landing page.
- Go to Settings→Macros.
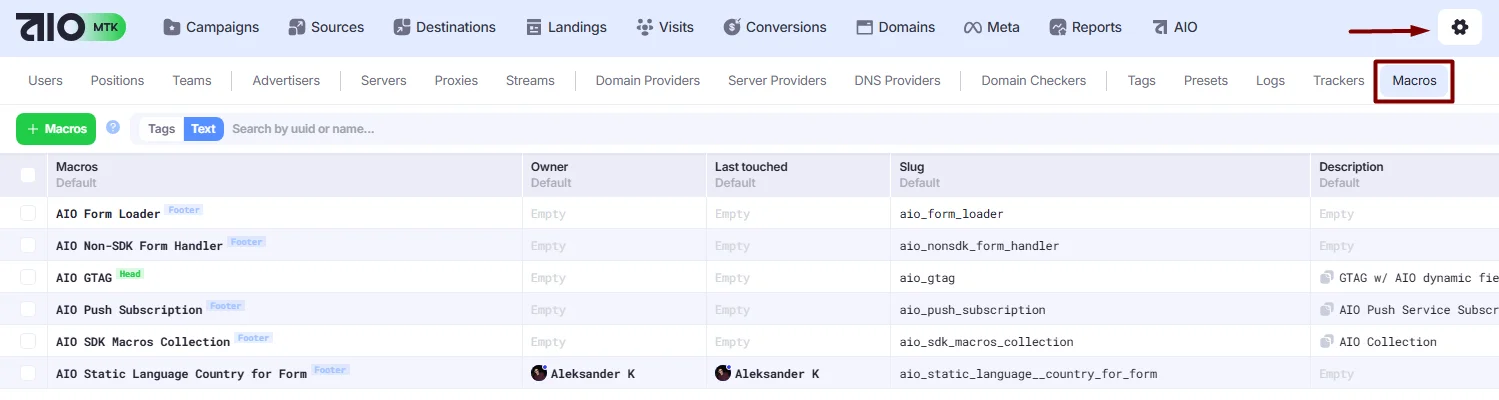
- Click +Macros to add your script.

- Paste your script into the HTML section.
You can configure its behavior using the toggles:
- Prefer Placement: select Header or Footer to place your macro at the beginning or end of the landing page, respectively.
- Active: toggle on to enable the macro, or toggle off to disable it.
- Global: toggle on to automatically apply the macro to all landing pages in your Tenant. Toggle off to prevent automatic application. When Global is disabled, you can add the macro to a landing page using its slug in the following format:
{{aio:macros:your_macros_slug}}.
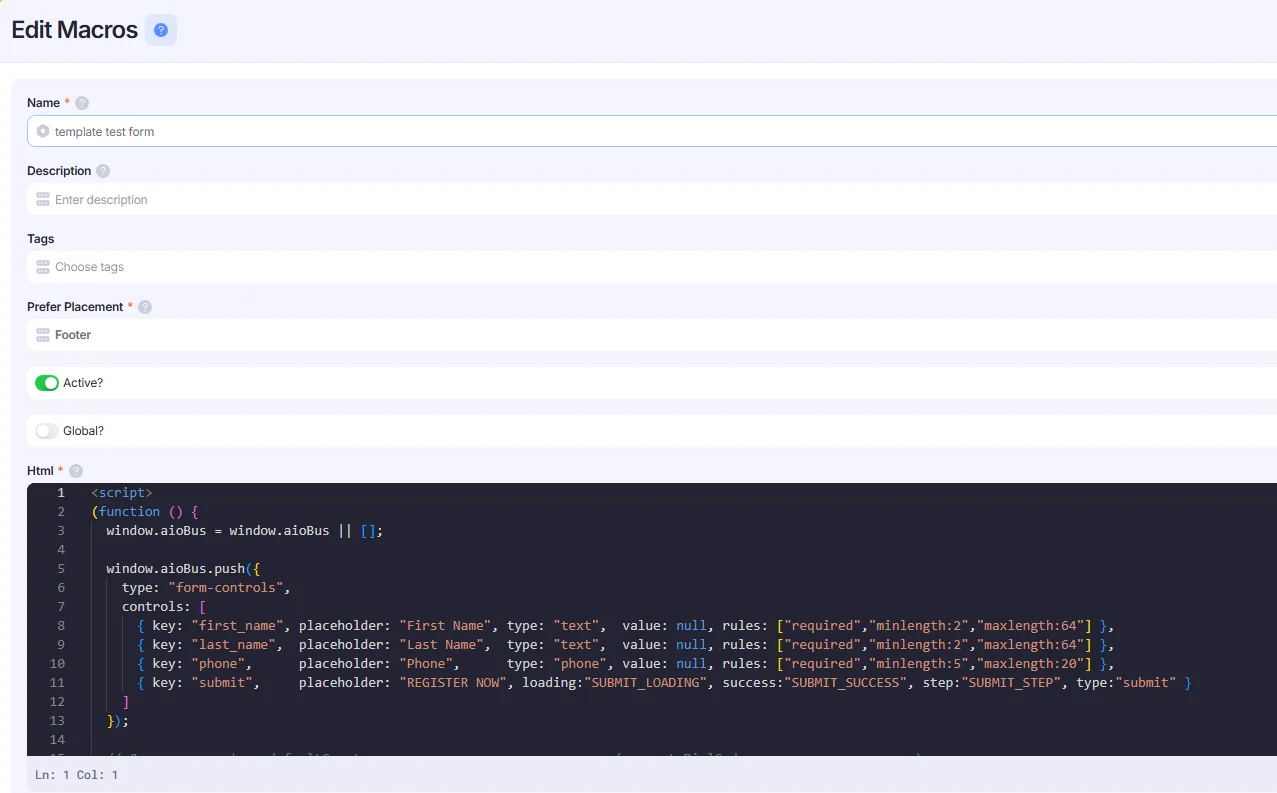
Here’s an example of a form script:
<script>
(function () {
  window.aioBus = window.aioBus || [];

  window.aioBus.push({
    type: "form-controls",
    controls: [
      { key: "first_name", placeholder: "First Name", type: "text",  value: null, rules: ["required","minlength:2","maxlength:64"] },
      { key: "last_name",  placeholder: "Last Name",  type: "text",  value: null, rules: ["required","minlength:2","maxlength:64"] },
      { key: "phone",      placeholder: "Phone",      type: "phone", value: null, rules: ["required","minlength:5","maxlength:20"] },
      { key: "submit",     placeholder: "REGISTER NOW", loading:"SUBMIT_LOADING", success:"SUBMIT_SUCCESS", step:"SUBMIT_STEP", type:"submit" }
    ]
  });

  // Локаль и телефон: defaultCountry по умолчанию, показывать код. (separateDialCode — если поддерживается)
  window.aioBus.push({
    type: "config",
    config: {
      form: {
        language: "en",
        phone: { defaultCountry: "us", showDialCode: true, separateDialCode: true }
      }
    }
  });
})();
</script>- Once your macro is added and saved, go to Landings. Right-click the desired landing and select Manage Landing.
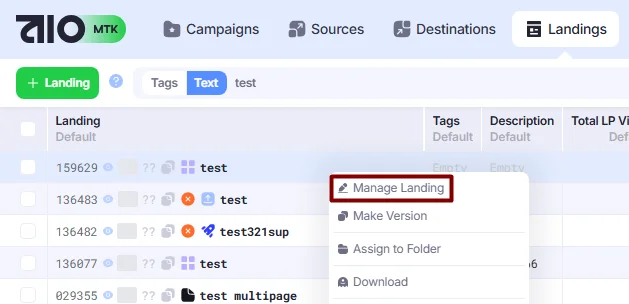
- In the Code section, add the
{{form}}tag to specify where your form should be displayed on the landing page.
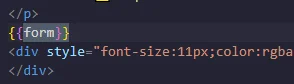
- Add the custom form macro you created earlier in the following format:
{{aio:macros:your_macros_slug}}. Insert it after the closing{{aio}}tag, as shown below:
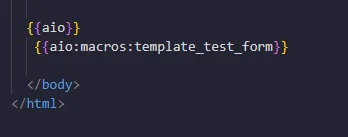
- Click Save to apply the changes. Your custom form will be automatically rendered and displayed to visitors on your landing page.
You can use the same logic to add styles to your landing pages and add as many macros as you want in Settings → Macros. Just make sure to insert your macros into the landing pages in the {{aio:macros:your_macros_slug}} format and place them after the closing {{aio}} tag.
Sending Lead Data to Destination
- Open the Destination (or Advertiser) you want to send the lead data to.
- Find the fields used to transfer lead data to the destination. You can insert the following placeholders into these fields:
- Phone: {{aio.visit.fields.phone}}
- Email: {{aio.visit.fields.email}}
- First Name: {{aio.visit.fields.first_name}}
- Last Name: {{aio.visit.fields.last_name}}
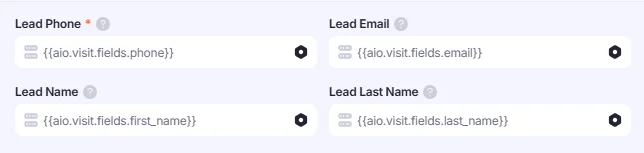
➡️If you use Simple Redirect links instead of API integration, you can add the placeholders to the redirect URL. Here’s the example:
https://exampleredirect.com/?click_id={{aio.visit.uuid}}&fname={{aio.visit.fields.first_name}}&lname={{aio.visit.fields.last_name}}&email={{aio.visit.fields.email}}&phone={{aio.visit.fields.phone}}