Work with Server, Domain, and DNS Providers in AIO
Introduction
This guide will help you learn how to add provider accounts to AIO. With built-in API integrations for popular server, domain, and DNS providers—such as DigitalOcean, NameSilo, Namecheap, Cloudflare, and others—you can easily connect your accounts and manage or purchase servers and domains directly within AIO.
Initial Setup
You have a few options for getting started:
- Connect your own accounts for server, domain, and DNS providers to AIO.
- Add your own domains and servers to AIO.
Please refer to the Manually Add Domains and Servers guide to learn more.
Adding Accounts
To connect your accounts in AIO, please follow the steps outlined below.
Adding a DNS Provider Account
To add a DNS provider account to AIO, you will need an email associated with your account and an API key.
- Go to Settings→ DNS Providers →+DNS Provider.

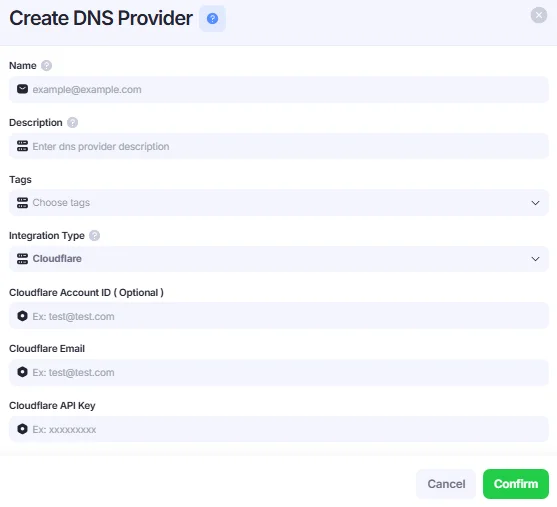
- Fill in all the required fields: Name, Description, Tags, Integration Type, and any details depending on the selected integration type—such as Cloudflare Global API Key, Cloudflare Account ID (optional), and Cloudflare Email. Once completed, click the Confirm button.
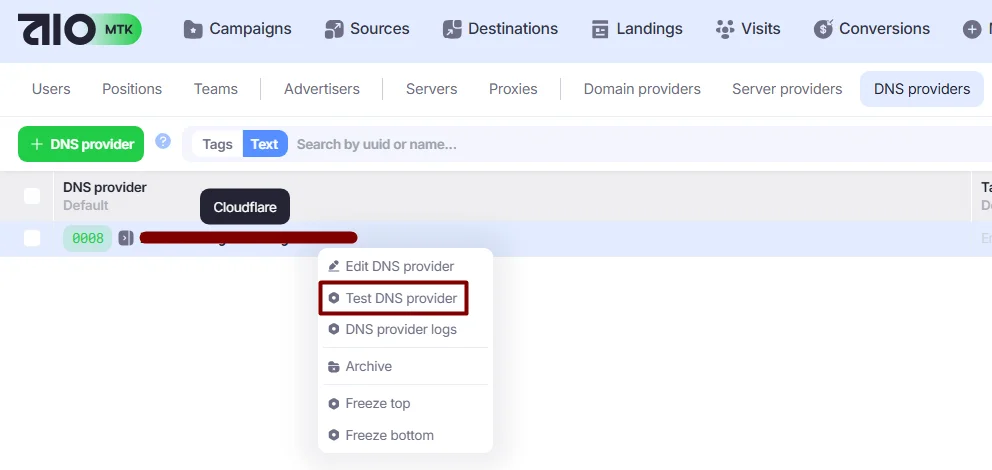
- Check if everything is working correctly. Right-click on the provider you’ve just added and select “Test DNS Provider.”
A successful API response might look like this:
{"[email protected]'s Account":["Super Administrator - All Privileges"]}
Adding a Server Provider Account
- Go to Settings→ Server Providers →+Server Provider.

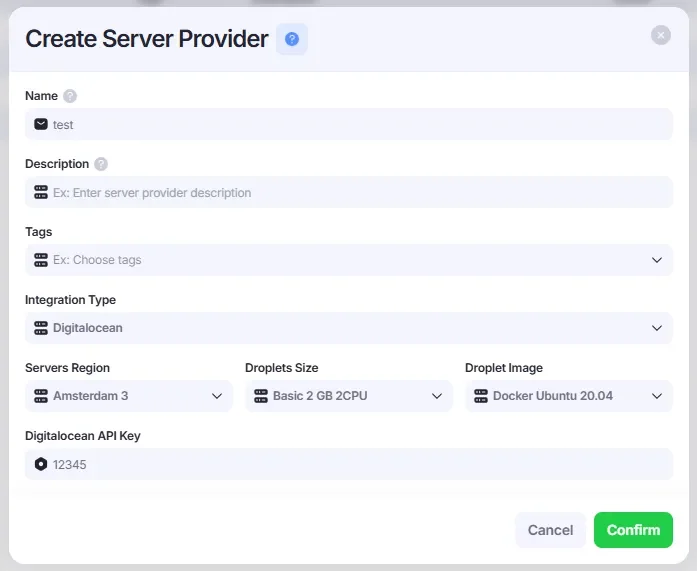
- Fill in all required fields: Name, Description, Tags, Integration type, and any details depending on the selected integration type—such as a DigitalOcean API key. Server Region, Droplet Size, Droplet Image. Once completed, click the Confirm button.
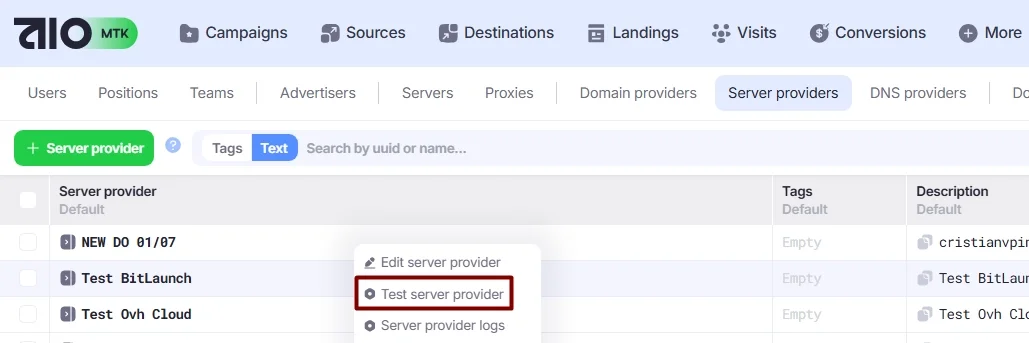
- Check if everything is working correctly. Right-click on the provider you’ve just added and select “Test Server Provider.” A successful API response might look like this:
Auth as [email protected], with 3 droplets limit.
A bad response will look like "Unidentified," showing no connection to the DO, which means there may be a problem with the credentials. This type of message also means that the account is inactive and cannot be used:
The account is inactive - Your team has been locked due to lack of payment or improper use of of the platform. Please open a ticket so our support staff can help.
Adding a Domain Provider Account
To add a Domain Provider account to AIO, you will need an API key associated with your account.
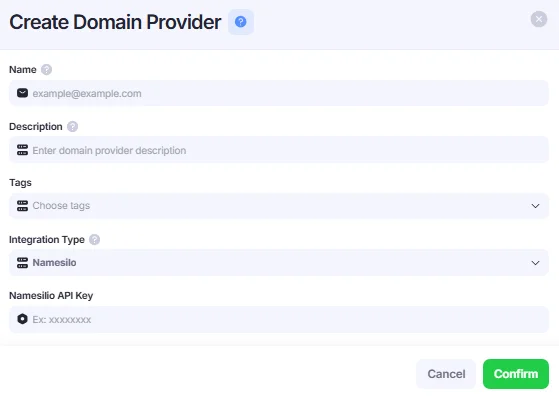
- Go to Settings→ Domain Providers →+Domain Provider.

- Fill in all the necessary fields: Name, Integration type, and any details depending on the selected integration type—such as API key. Click the “Confirm” button.
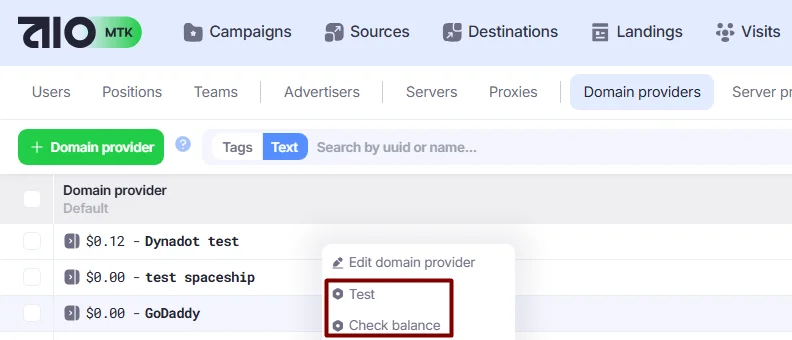
You can test the new provider and check your balance by right-clicking on it and selecting “Test” or “Check Balance”:
To learn how to buy domains and servers within AIO, please refer to How To Buy Servers and Domains in AIO.
To learn how to manually add your domains and servers to AIO, please refer to How to Manually Add Domains and Servers.