Use AIO for Facebook Launches
Inroduction
Your Tenant includes a preconfigured, ready-to-use Facebook Source with CAPI already enabled. This guide explains how to set up an AIO campaign for Facebook, generate a Facebook tracking link, and use FB CAPI.
Before proceeding, make sure you have already completed the initial setup and have a server and domain, destination, landing pages (if needed), and a campaign created in AIO. If you haven’t completed the setup yet, please refer to the following guides:
Take First Steps in AIO
Set Up a Campaign
How to Use AIO for Facebook Launches
1. Create a Campaign and Select a Traffic Filter
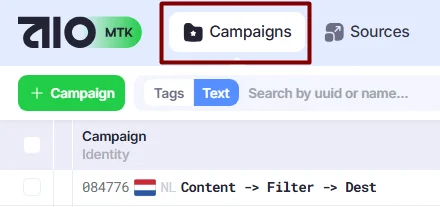
- Go to Tracker→Campaigns to create a Campaign in AIO where you want to direct your Facebook visitors.
- Open the Edit Campaign window and, in the Traffic Filter section, select the traffic filter you want to use. By default, you can choose between AIO Cloak and AIO Filter Service, and both work equally well with Facebook.
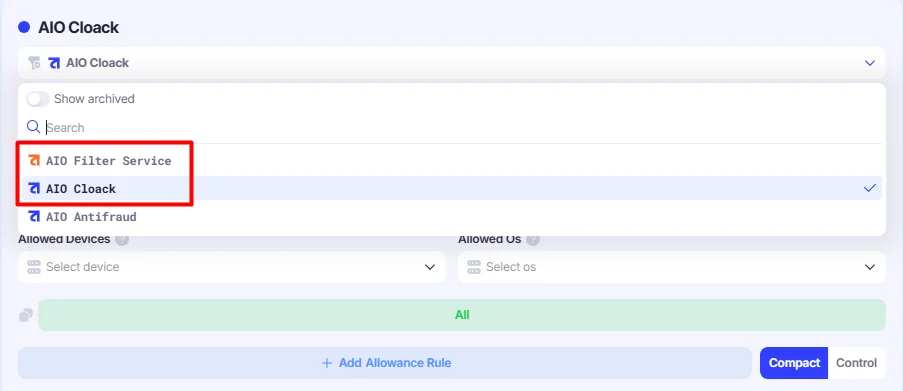
Select a traffic filter in Edit Campaign window.
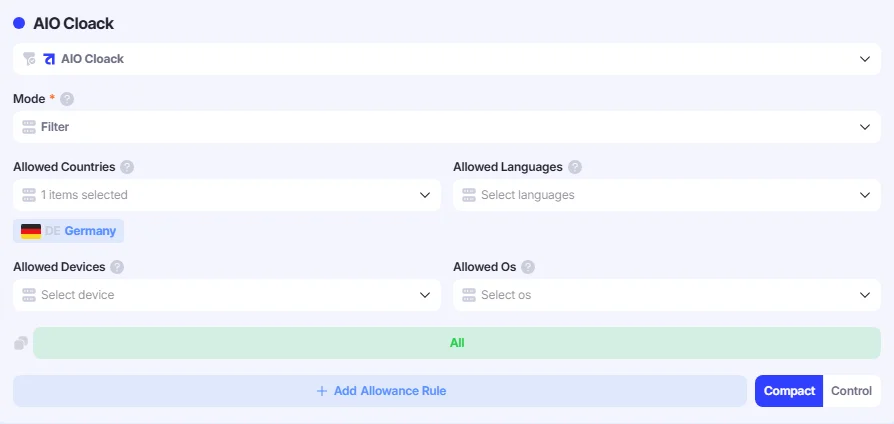
- AIO Cloak is a basic traffic filter that blocks bots and crawlers and allows you to configure rules (Allowed Languages, Countries, OS, Devices, and any additional Allowance rules).
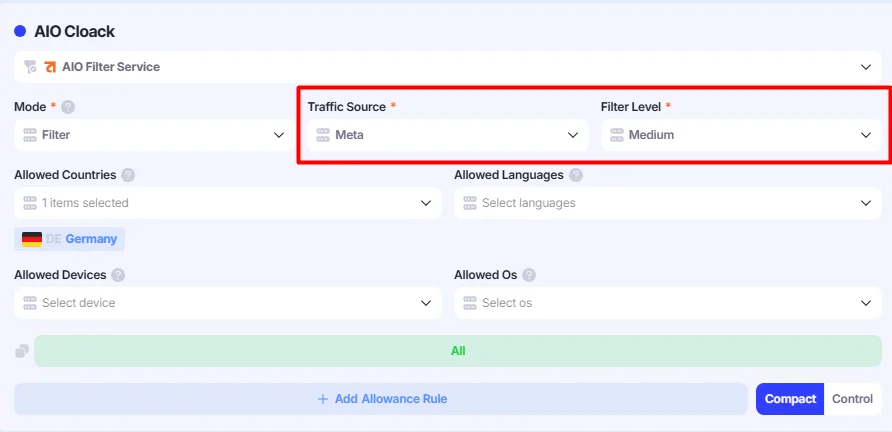
- AIO Filter Service (recommended) is an advanced version of the basic AIO Cloak. It is typically used for traffic sources that are more sensitive to bots and moderation (such as Taboola and Google), but it also supports Facebook traffic. We recommend using this filter, as it is a more advanced version.
For Facebook, select Traffic Source → Meta and Filter Level → Medium:
2. Add Your Social Profiles and Configure the Cost Update Strategy
To fetch Facebook ad costs into AIO, you must add your Social Profiles in the Meta section and enable a cost update strategy in your AIO Campaign. If you haven’t added any accounts to AIO yet, you can refer to this guide for the full setup process: Autofetch Facebook Ad Costs in AIO.
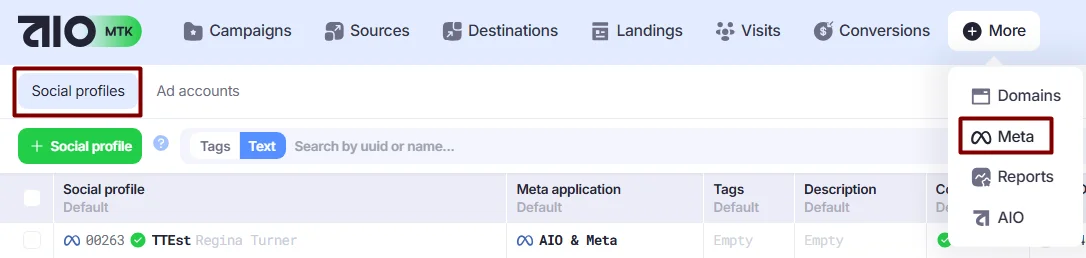
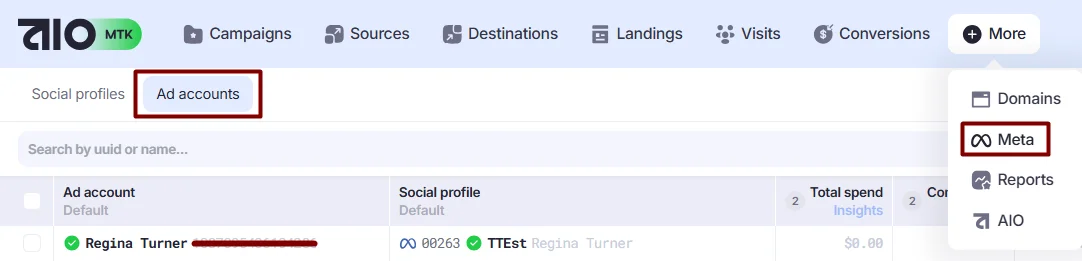
- Go to the Meta→Social Profiles and Ad Accounts sections to make sure your Social Profiles and Ad Accounts are connected and functioning properly. The ✅ icon indicates that everything is working correctly.
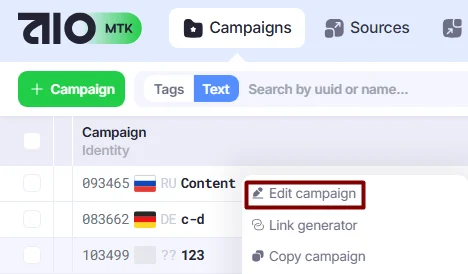
- Go to Tracker→Campaigns and open the Edit Campaign window.
- Find the Cost Update Strategy section and select the desired strategy from the drop-down list:
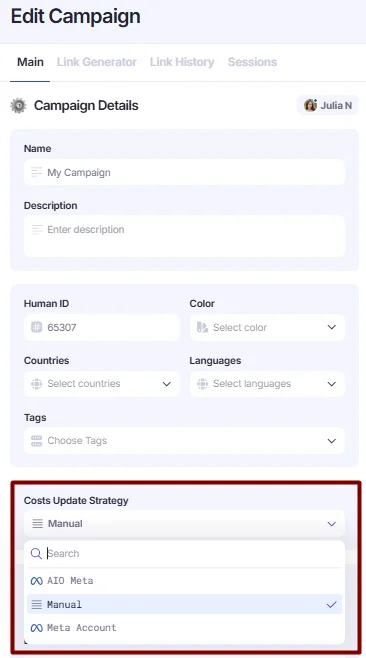
- Manual — the default option if cost pulling from Meta is not configured for the campaign. Costs can only be updated manually.
- AIO Meta — costs for this campaign are automatically pulled from Meta. Visits must contain the FB Ad ID parameter for this strategy, but if you use shortened Facebook links that do not contain the FB Ad ID parameter, use the Meta Account strategy instead.
- Meta Account—AIO pulls the cost data directly from the selected FB Account ID and applies it to the corresponding AIO campaign on a 1-to-1 basis. It is especially useful when the Facebook tracking link is shortened and does not contain any FB parameters.
3. Generate a Facebook Link
A full guide explaining the entire link generation process can be found here: Generate Links.
- Open the Link Generation window in any of the available ways (right-click the campaign→Link generator, or Link Source in the Edit Campaign window.)
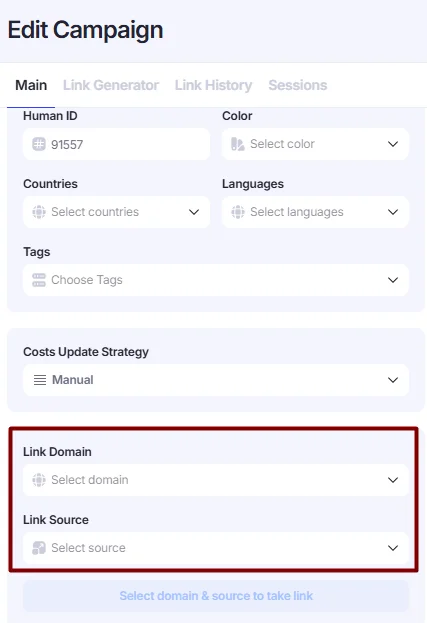
- Select a domain for your link and choose the FB w/ CAPI Source from the drop-down list. Make sure to fill in the Facebook Pixel ID and FB CAPI Token, and select the actions you want to send — this is required to transfer events from AIO to Facebook CAPI.
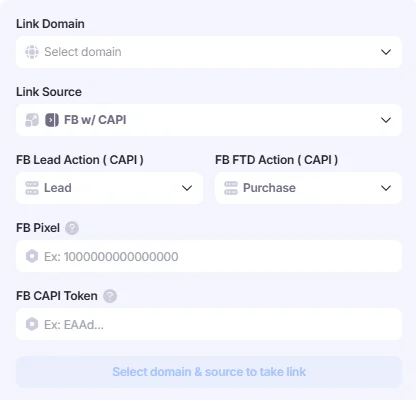
CAPI Actions define which Facebook events are sent when conversions are created in AIO.
For example, you selected FB Lead Action asCompleteRegistration, and FTD Action as Purchase.
When a Lead conversion is created in AIO, the CompleteRegistration event is sent to Facebook. When an FTD conversion is created, the Purchase event is sent.
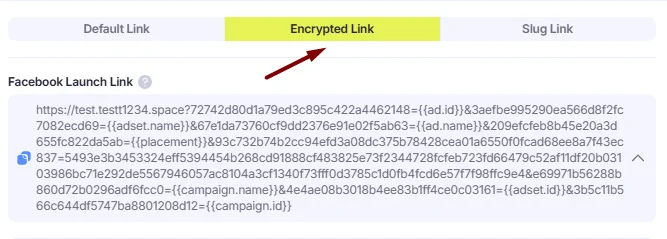
- Once the link is generated, you can choose between three formats: Default Link, Encrypted Link, and Slug Link.
We recommend using the Encrypted Link to reduce the chance of your links appearing on spy tools.
Copy the generated link and paste it into the Website URL field in Facebook.
4. Test your link
❕Always test links in Incognito mode, or append &options=new_session to the test URL.
Since AIO identifies unique visits using browser cookies, each test must run in a fresh browser session. Otherwise, the visit may be treated as non-unique and continue from the previously reached Flow step.
5. (Optional) Add a Domain Change Step
For additional safety, you can request our support team to add a Domain Change step to your Flow. This step automatically replaces the tracking domain (used in the Facebook link) with another domain once the visit reaches that step. As a result, the landing page is opened under a different domain for the visitor.
This step will be added as an additional field in your campaign settings, where you can select a domain from the drop-down list.
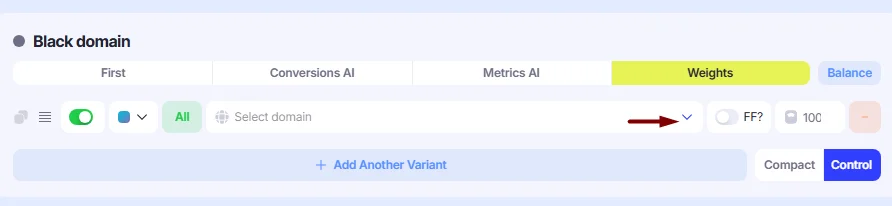
- If a domain used in the Domain Change step becomes banned, there is no need to restart the Facebook campaign. Just use the Replace Domain action to swap the banned domain.
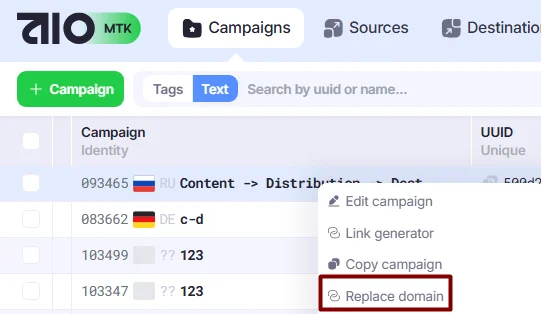
Once you’ve generated a Facebook link for your campaign, you’re ready to go.
In the next part, you’ll learn how to view CAPI logs to check whether Facebook has received events for your conversions.
FB CAPI
How To View FB CAPI Logs
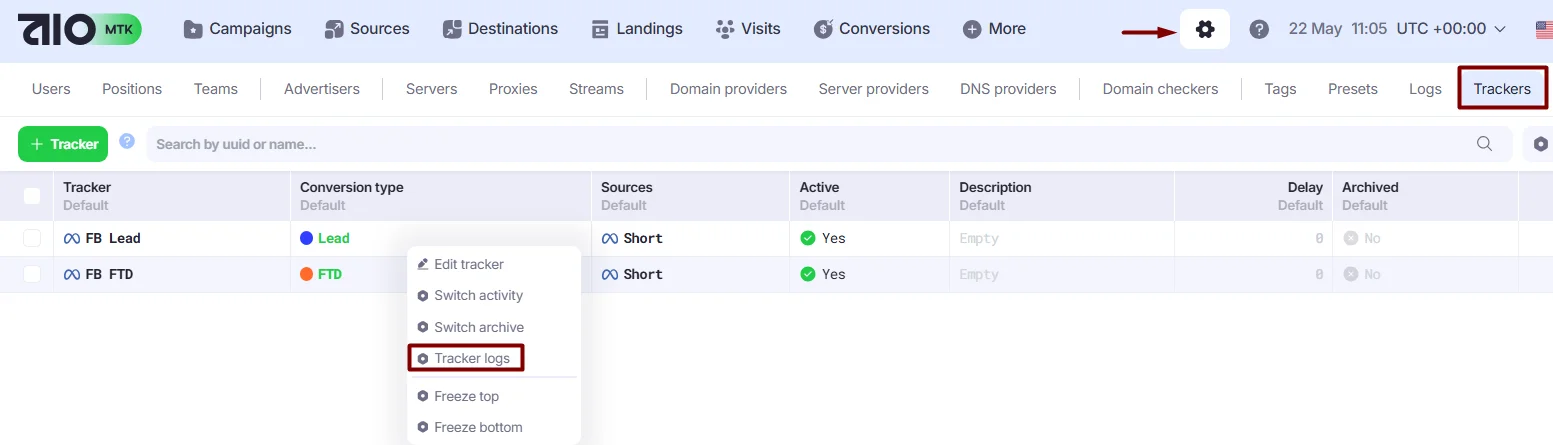
- Go to Settings→Trackers. Right-click on a desired Tracker and select Tracker Logs.
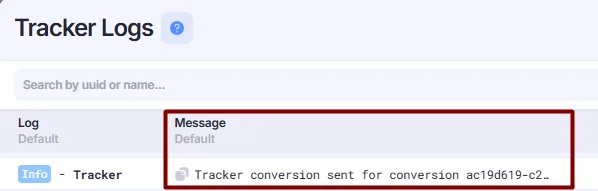
- The Log Message is hidden by default and can only be viewed using a 2FA code.
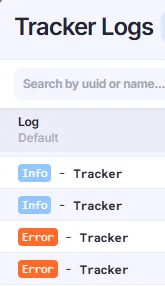
- Successful responses from Facebook are marked as
Info, while failed responses are marked asError.
How to Edit or Add Additional FB CAPI Trackers
AIO sends data to Facebook using CAPI Trackers (Settngs→ Trackers), which are triggered when a conversion is created in AIO for a visit originating from the selected Source.
By default, Lead and FTD conversions trigger the Trackers for the FB w/ CAPI Source. If you use additional conversion types or Facebook Sources, you can edit the existing Trackers or create new ones.

- To add a new Source to the CAPI Tracker:
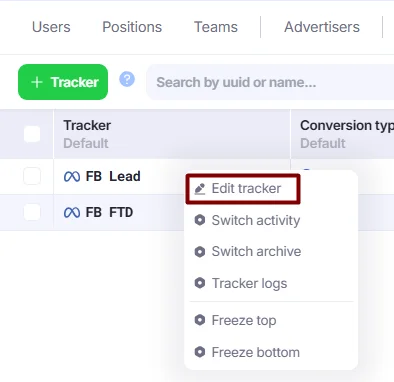
- Go to Settings→Trackers. Right-click on a desired Tracker and select Edit Tracker.
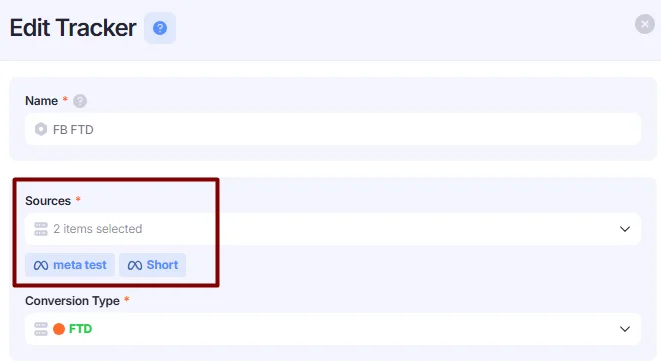
- Add your additional FB Source to the Sources field. Click Confirm to save the changes.
- To add a new CAPI Tracker:
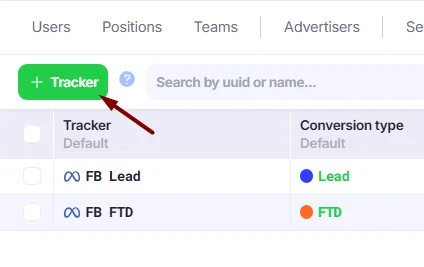
- Go to Settings→Trackers. Click +Tracker.
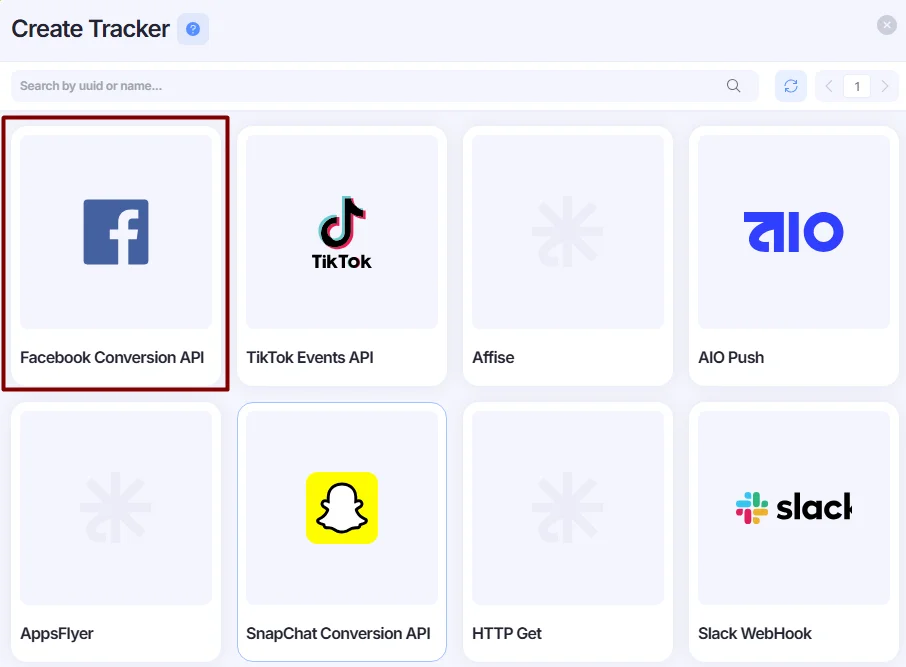
- Select Facebook Conversion API.
- Select your conversion type in the Conversion Type field.
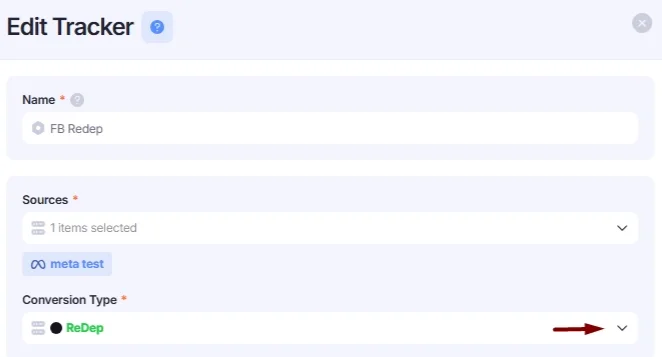
- Fill in the required fields. Most placeholders are common across Facebook CAPI Trackers (for example,
{{aio.visit.fields.fb_capi_token}}and{{aio.visit.fields.fb_pixel}}).
The Event field should reference the placeholder associated with the conversion type being sent:
{{aio.visit.fields.fb_lead_action}}— event selected as FB Lead Action in the Link Generator{{aio.visit.fields.fb_ftd_action}}— event selected as FB FTD Action in the Link Generator
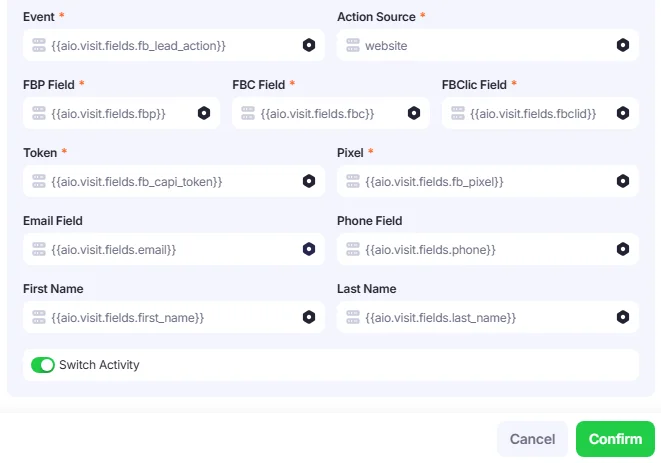
Alternatively, the Event can be hardcoded in the Tracker as a static value. In this configuration, the same event will always be sent for the selected conversion type, regardless of the event selected in the Link Generator.

How to Add Facebook Pixel to AIO
If you don’t want to use FB CAPI, you can send events to Facebook using a Facebook Pixel.
You can add a Facebook Pixel to AIO either on a landing page directly (e.g. on Thank-You Page) or as a global macro.
To add Facebook Pixel as a macro, follow these steps:
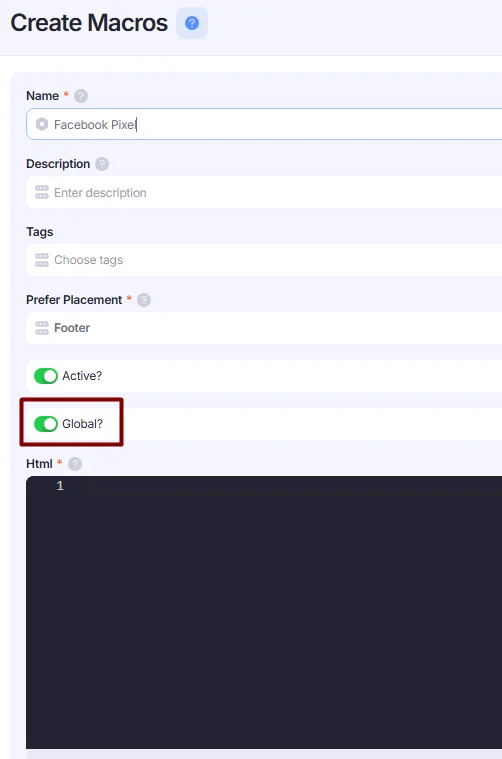
- Go to Settings→Macros. Click +Macros.

- Enter your Facebook Pixel code into the HTML field and choose whether the Macro should be Global or Non-Global:
- Global — automatically applied to all AIO landing pages
- Non-Global — applied only to selected landing pages using the Macro slug in the following format:
{{aio:macros:YOUR_SLUG}}
Example:
You created a non-global Facebook Pixel Macro with the slug fb_pixel.
To enable this Macro on a specific landing page, insert the following tag:{{aio:macros:fb_pixel}}

- Events will be sent to Facebook according to your Pixel code configuration. Please note that, in this case, AIO does not store logs for Facebook Pixel events. Only conversions sent through CAPI can be logged in the system; custom Pixel events are not tracked in AIO logs.