Customize SDK Form
Introduction
AIO SDK allows you to load and customize a form on your landing pages. By placing a {{form}} macros in your HTML, the form is injected into that spot once the script loads, displaying predefined styles and behavior set by the SDK.
In this guide, you will learn:
- How to configure styles, settings, and behavior globally or locally.
- How to modify the form’s layout, steps, and controls.
How the Form Works
- Form Loading: Place the
{{form}}macro in your Landing page HTML code. The AIO SDK will replace this macro with the complete form once the page loads. - Default Behavior & Styles: By default, the form comes with predefined styles and behavior from the AIO SDK. You can override these styles or settings either globally (for all landing pages) or locally (for individual landing pages).
Code example in Landing HTML:
{{form}}When the AIO SDK is loaded, this macro is replaced with the actual form.
Global vs. Local Configuration
- Global: Use AIO SDK Macros Collection from Settings → Macros to set up default (global) form styles and settings that apply to all landing pages.

- Local: Insert
<style>or<script>blocks directly into a Landing page's HTML to override or add additional settings for that specific page.
Form Configuration Examples
Style Configuration
A full list of available Form Style settings can be found at the end of this guide.
Below is an example of a <style> block with modified variables that override default styles:
Example script: Overriding Default Styles
<style>
  .aio-sdk-form {
    --aio-sdk-form-padding: 30px 30px 20px;
    --aio-sdk-input-bg: white;
    --aio-sdk-input-font-size: 1em;
    --aio-sdk-input-border: #ced4da;
    --aio-sdk-input-border-radius: 0px;
    --aio-sdk-input-padding: 15px 20px;
    --aio-sdk-input-color: black;

    --aio-sdk-submit-bg: #60359b;
    --aio-sdk-submit-padding: 15px 20px;
    --aio-sdk-submit-border: transparent;
    --aio-sdk-submit-border-radius: 0px;
    --aio-sdk-submit-color: white;
    --aio-sdk-submit-font-size: var(--aio-sdk-input-font-size);
  }
</style>
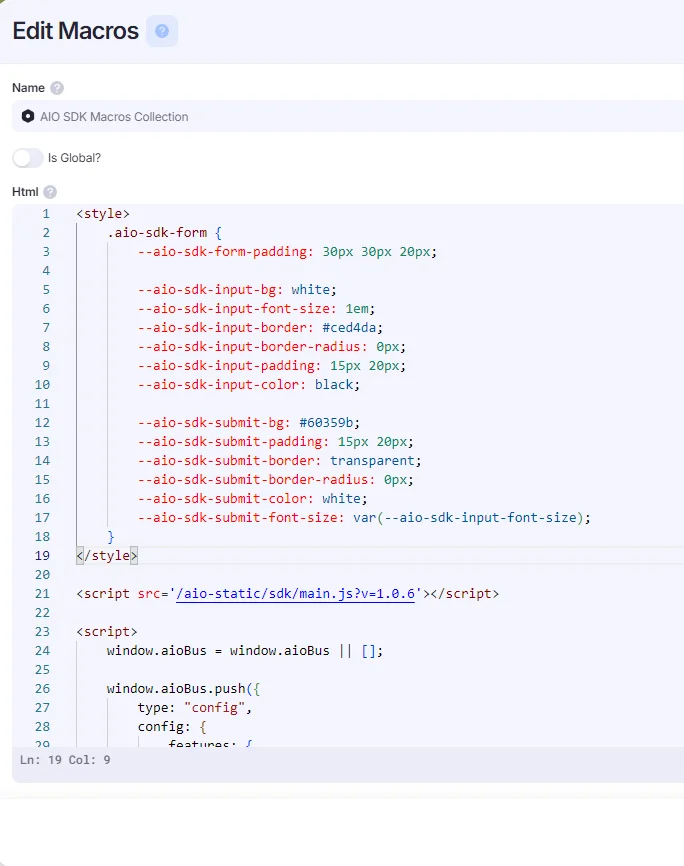
How to Configure Global Style
- Go to Settings→Macros and find the AIO SDK Macros Collection. Right-click it and select “Edit Macros”.

- Add the style configuration script to the Code window.
- Once added, these configurations will automatically apply to all landings using the SDK Form.
How to Configure Local Style
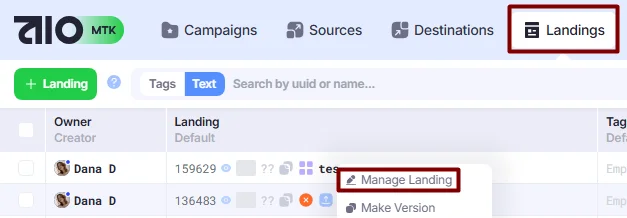
If you want to style or configure a specific landing page differently, insert your own <style> block into that page’s HTML. Local styles will override global styles for that specific page.
- Go to Landings. Right-click the desired landing page and select “Manage Landing”.
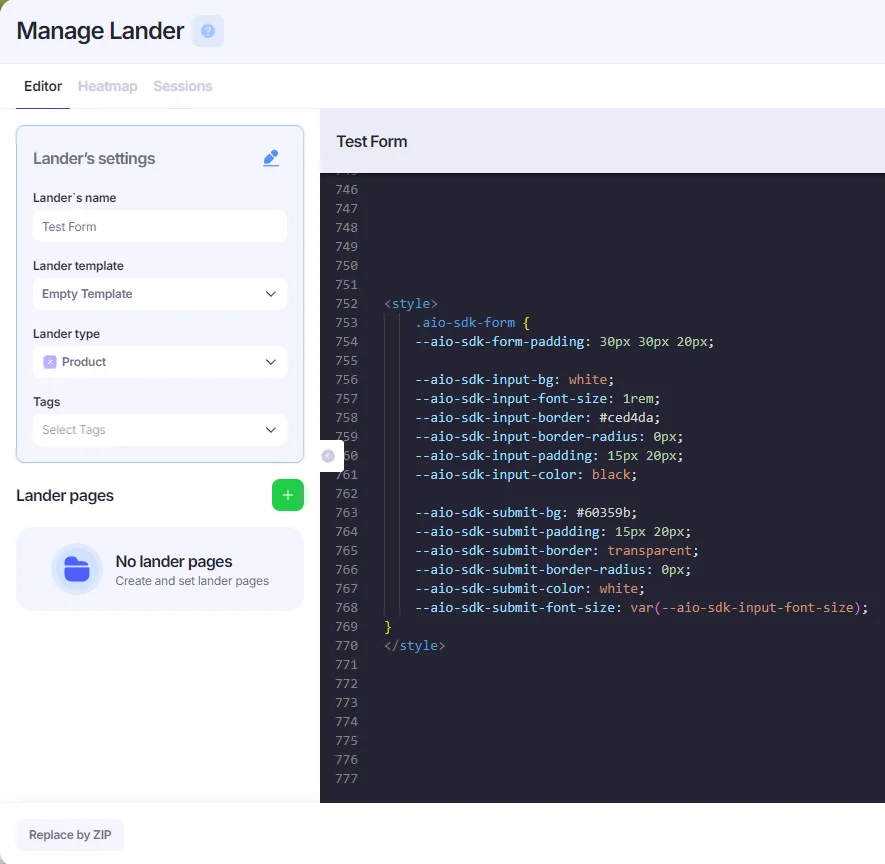
- In the Code section, insert the
<style>block into your landing page’s HTML to override or customize the form styles.
Form Behavior Configuration
A full list of available Form Behavior settings and their descriptions can be found at the end of this guide.
You can also customize the advanced behavior and functionality of the form by adjusting SDK settings either locally via a push script or globally via macros.
Below are examples of the local push script and the global AIO SDK script:
How to Configure Global Behavior
- Go to Settings→Macros and find the AIO SDK Macros Collection. Right-click it and select “Edit Macros”.

- Add the form behaviour script. The global form behavior configuration is inserted as an additional
form: {}block. - Once added, these configurations will automatically apply to all landings using the SDK Form.
Example script: AIO SDK Macros Collection script with the form: {} block
<script src="/aio-static/sdk/main.js?v=1.0.12"></script>

<script>
    window.aioBus = window.aioBus || [];

    window.aioBus.push({
        type: "config",
        config: {
            features: {
                backFix: true,
                fbCapi: true,
                fbPixel: true,
                form: true,
                browserTimezone: true,
                landed: true,
                scrolling: true,
                sessionRecords: true,
                timeOnLandings: true,
                windowDimensions: true,
            },
            backFix: {
                    enabledBackFix: () => ['xxx', 'yyy', 'ddd'].includes(aio.landing.lander_type_uuid),
                    enableStrangeUrlParameters: true,
                    pathName: '27f97629ddf7499c',
                    localStorageKey: '_____utm',
                    link: '{{link}}&backfix=true',
                },
            form: {
									  "url": "/",
										"selector": ".aio-form",
										"defaultCss": true,
										"successTimeoutSeconds": 5,
										"language": "navigator.language.slice(0, 2)",
										"defaultCountryCode": "GB",
										"stepsShowing": true,
										"collectDataEvent": "blur",
										"rejectedMessage": "We cant register you at this time.",
										"intlParameters": {
												"nationalMode": true,
												"autoPlaceholder": "aggressive"
										}
            }
        }
    });
</script>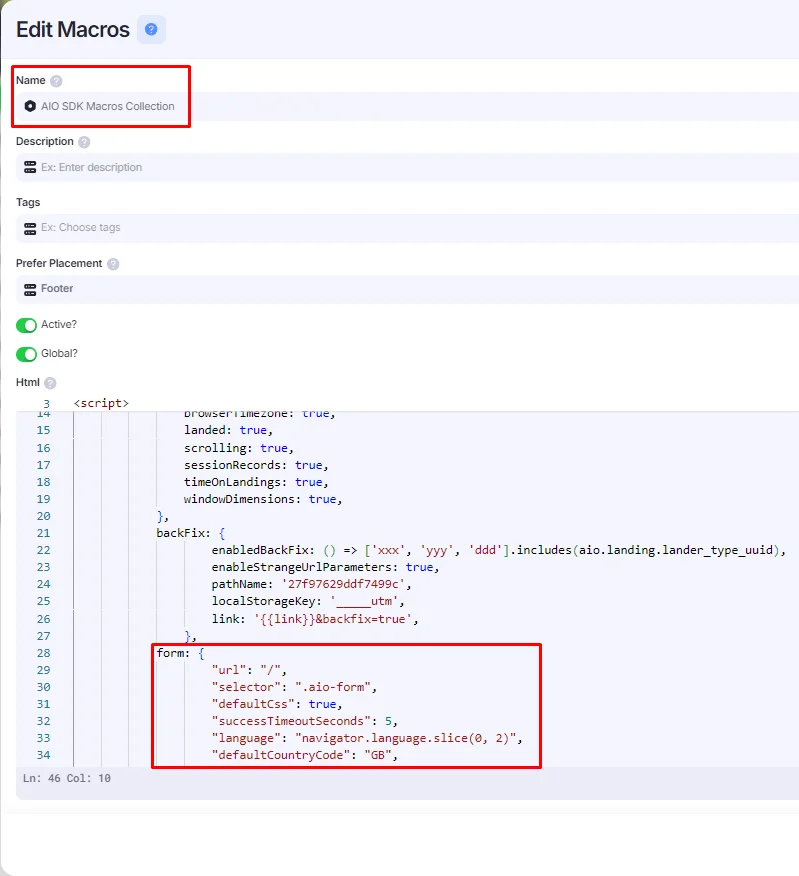
How to Configure Local Behavior
If you want to configure Form behavior for a specific landing page, insert a local push script <script> into the page’s HTML after the {{aio}} tag. Local scripts override the global form settings for that specific page.
NOTE: Local push script must be inserted after the {{aio}} tag to correctly override global Form settings.
- Go to Landings. Right-click the desired landing page and select “Manage Landing”.
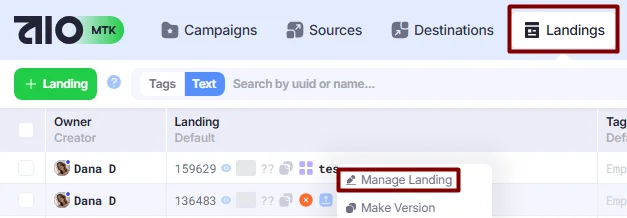
- In the Code section, insert your push script into your landing page’s HTML to override or customize the form styles.
Example script: Local push script with the form: {} block
<script>
  window.aioBus.push({
    type: "config",
    config: {
      form: {
        // In this example, we:
        // change form language to always be EN
        // modify timeout from 5 to 10 seconds
        // change message on reject text
        language: "en",
        successTimeoutSeconds: 10,
        rejectedMessage: "You've been rejected.",
      }
    }
  });
</script>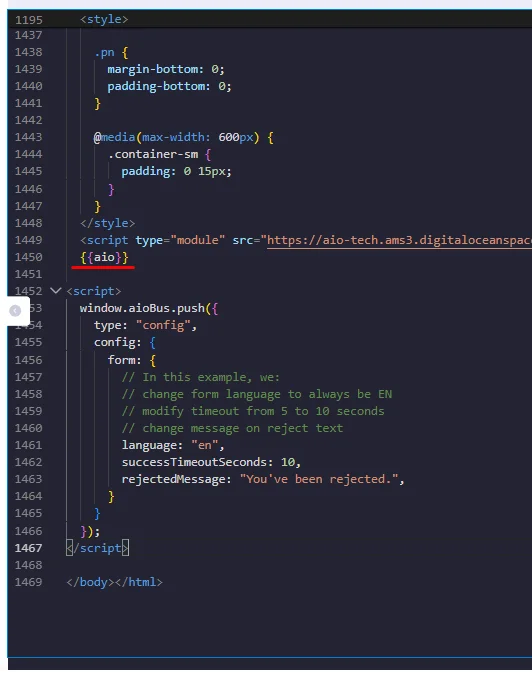
Useful Examples
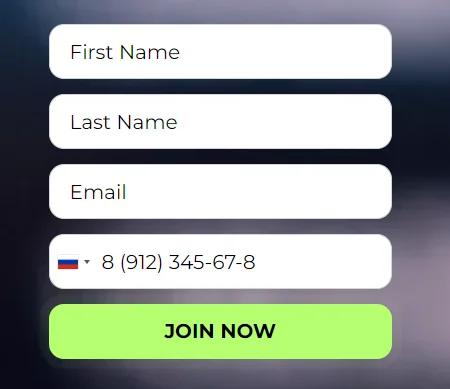
Example 1: Matching the Landing’s Color Theme Locally
Let us assume you have a landing, where the general color theme is green, and you want to customize your form to match this theme (So it doesn’t feel out of place)
With available CSS variables, this can be easily done, and you can change the button colors, field borders, and more.
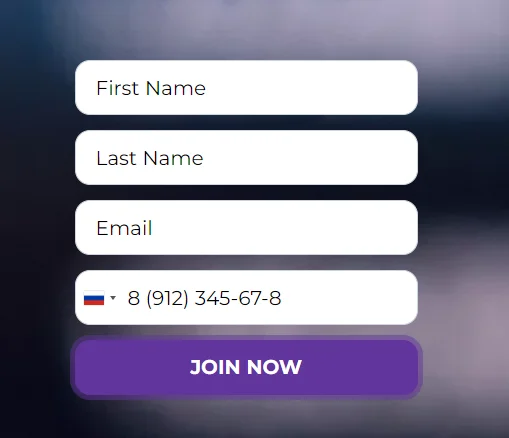
- Default Form: Here’s an example of how the form might look before applying any local overrides:
- Landing Page Theme: On this landing, the general color is green, so all other buttons are green and have slightly different shapes and styles:

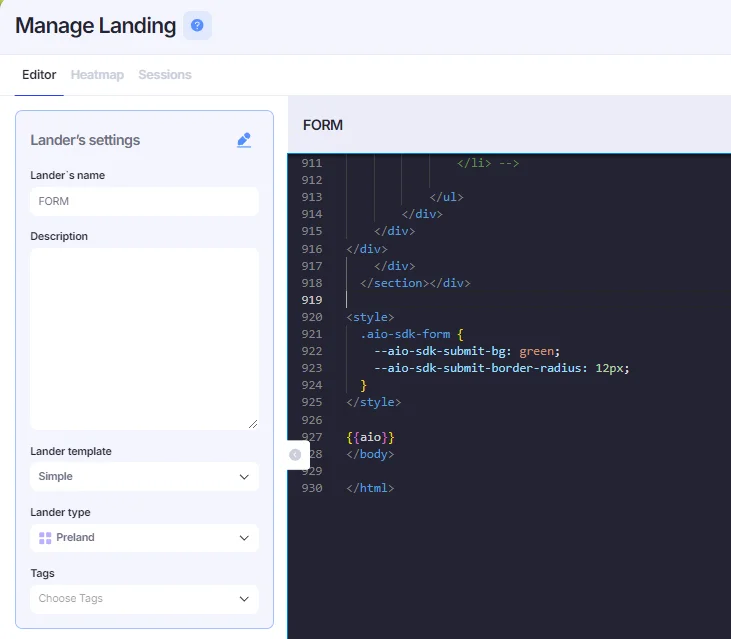
- Override the Variables: We override the colour of the submit button to green to match the overall theme. This is done by inserting the following
<style>block into the landing page HTML using the Landing Editor:Example style tag
<style>
  .aio-sdk-form {
    --aio-sdk-submit-bg: green;
    --aio-sdk-submit-border-radius: 12px;
  }
</style>
- Result: With that simple change, the form now matches your green color scheme and and fits much better:
Example 2: Globally Configuring Form Behavior
- Default Global Form: By default, our form is configured with the following settings:
- Displays the message “We can't register you at this time” message if the destination rejects Visit.
- Has a 5-second timeout before pushing Leads to Destination after successful registration.
- Automatically translates the form to match the Visit's language.
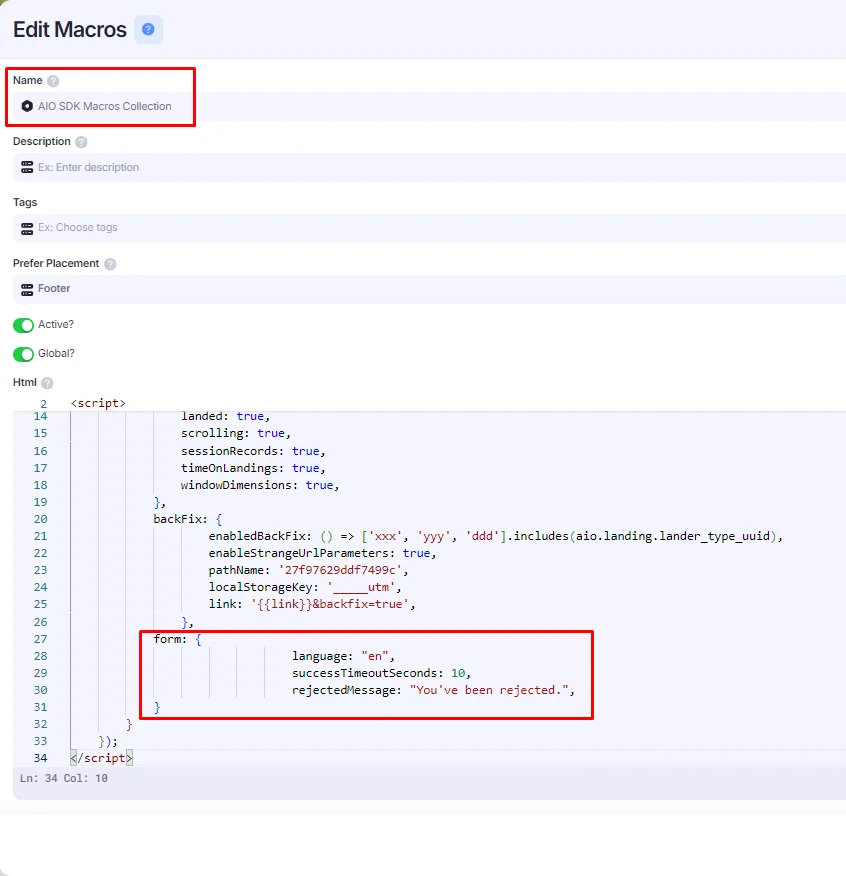
- Macros Script: To change the behaviour for all Landings globally, modify the AIO SDK Macros Collection script. For example, configure the form to:
- Display "You've been rejected." for rejected Leads.
- Apply a 10-second cooldown.
- Always use EN as a default language.
- Result: The landing page configured with these settings will now apply the updated configurations.
Example of the AIO SDK Macros Collection script
<script src="/aio-static/sdk/main.js?v=1.0.12"></script>
<script>
    window.aioBus = window.aioBus || [];

    window.aioBus.push({
        type: "config",
        config: {
            features: {
                backFix: true,
                fbCapi: true,
                fbPixel: true,
                form: true,
                browserTimezone: true,
                landed: true,
                scrolling: true,
                sessionRecords: true,
                timeOnLandings: true,
                windowDimensions: true,
            },
            backFix: {
                    enabledBackFix: () => ['xxx', 'yyy', 'ddd'].includes(aio.landing.lander_type_uuid),
                    enableStrangeUrlParameters: true,
                    pathName: '27f97629ddf7499c',
                    localStorageKey: '_____utm',
                    link: '{{link}}&backfix=true',
                },
            form: {
						        language: "en",
						        successTimeoutSeconds: 10,
						        rejectedMessage: "You've been rejected.",
            }
        }
    });
</script>
Full Default Overridable Settings
Full Default Styles
Below is the complete list of default CSS variables that you can override, either globally or locally:
    --aio-sdk-form-padding: 30px 30px 20px;

    --aio-sdk-form-layout-gap: var(--aio-sdk-input-margin);

    --aio-sdk-form-steps-gap: 60px;
    --aio-sdk-form-steps-margin: 15px;
    --aio-sdk-form-step-diameter: 35px;

    --aio-sdk-form-step-font-size: var(--aio-sdk-input-font-size);
    --aio-sdk-form-step-line-color: var(--aio-sdk-input-bg);
    --aio-sdk-form-step-bg: var(--aio-sdk-input-bg);
    --aio-sdk-form-step-border: var(--aio-sdk-submit-bg);
    --aio-sdk-form-step-color: var(--aio-sdk-input-color);

    --aio-sdk-form-step-active-bg: var(--aio-sdk-submit-bg);
    --aio-sdk-form-step-active-border: var(--aio-sdk-submit-bg) ;
    --aio-sdk-form-step-active-color: var(--aio-sdk-submit-color);

    --aio-sdk-input-label-color: black;
    --aio-sdk-input-label-font-size: 1em;
    --aio-sdk-input-label-margin : 3px;

    --aio-sdk-input-margin: 15px;
    --aio-sdk-input-bg: white;
    --aio-sdk-input-font-size: 1em;
    --aio-sdk-input-border: #ced4da;
    --aio-sdk-input-border-radius: 0px;
    --aio-sdk-input-padding: 15px 20px;
    --aio-sdk-input-color: black;

    --aio-sdk-input-textarea-size: 100px;
    --aio-sdk-input-checkbox-gap: 5px;

    --aio-sdk-submit-bg: #60359b;
    --aio-sdk-submit-padding: var(--aio-sdk-input-padding);
    --aio-sdk-submit-border: transparent;
    --aio-sdk-submit-border-radius: 0px;
    --aio-sdk-submit-color: white;
    --aio-sdk-submit-font-size: var(--aio-sdk-input-font-size);
Full Form Behaviour Settings
This is the default JSON configuration for the form. You can override any of these properties:
{
  "form": {
    "url": "/",
    "selector": ".aio-form",
    "defaultCss": true,
    "successTimeoutSeconds": 5,
    "language": "navigator.language.slice(0, 2)",
    "beforeSubmitPromises": [],
    "defaultCountryCode": "GB",
    "stepsShowing": true,
    "collectDataEvent": "blur",
    "rejectedMessage": "We cant register you at this time.",
    "activeStepClass": "aio-sdk-step-container-active",
    "availableStepClass": "aio-sdk-step-container-available",
    "hiddenClass": "aio-sdk-form-hidden",
    "intlParameters": {
      "nationalMode": true,
      "autoPlaceholder": "aggressive"
    },
    "templates": {
      "steps": "<div class='aio-sdk-steps-container'>%steps%</div>",
      "step": "<div class='aio-sdk-step-container' data-step='%step%'>%step%</div>",

      "layout": "<div class='aio-sdk-layout-container'>%layout-rows%</div>",
      "layout-row": "<div class='aio-sdk-row-container'>%layout-columns%</div>",
      "layout-column": "<div data-form-item-key='%form-item-key%' class='aio-sdk-column-container'></div>",

      "hidden": "<div><input type='hidden' data-step-rule='%key%' name='%key%' value='%value%'/></div>",
      "text": "<div class='aio-sdk-input-container'><input type='text' data-step-rule='%key%' class='aio-sdk-input' placeholder='%placeholder%' name='%key%' value='%value%'/></div>",
      "number": "<div class='aio-sdk-input-container'><input type='number' data-step-rule='%key%' class='aio-sdk-input' placeholder='%placeholder%' name='%key%' value='%value%'/></div>",
      "textarea": "<div class='aio-sdk-input-container'><textarea class='aio-sdk-input' data-step-rule='%key%' placeholder='%placeholder%' name='%key%'>%value%</textarea></div>",
      "select": "<div class='aio-sdk-input-container'><select class='aio-sdk-input' data-step-rule='%key%' name='%key%'/>%select-options%</select></div>",
      "select-option": "<option value='%option-value%' %selected%>%option-label%</option>",
      "select-option-placeholder": "<option hidden value=''>%placeholder%</option>",
      "phone": "<div class='aio-sdk-input-container'><input type='tel' data-step-rule='%key%' class='aio-sdk-input' placeholder='%placeholder%' name='%key%' value='%value%'/></div>",
      "email": "<div class='aio-sdk-input-container'><input type='email' data-step-rule='%key%' class='aio-sdk-input' placeholder='%placeholder%' name='%key%' value='%value%'/></div>",
      "date": "<div class='aio-sdk-input-container'><input type='date' data-step-rule='%key%' class='aio-sdk-input' placeholder='%placeholder%' name='%key%' value='%value%'/></div>",
      "checkbox": "<div class='aio-sdk-input-container aio-sdk-input-checkbox-container'><input data-step-rule='%key%' type='checkbox' class='aio-sdk-input-checkbox' name='%key%' id='%key%' value='%value%'/><label for='%key%'>%placeholder%</label></div>",
      "submit": "<div class='aio-sdk-input-container'><input value='%placeholder%' data-value='%placeholder%' data-loading='%loading%' data-success='%success%' data-step='%step%' type='submit'/></div>"
    }
  }
}To learn how to set up SubmitPromises and BeforeSubmitPromisesplease refer to this guide: AIO SDK Form: Submit Promises and Before Submit Promises.