Work with Presets
Introduction
This guide will explain what a Preset is within AIO and walk you through the process of creating and managing Presets.
What is a Preset?
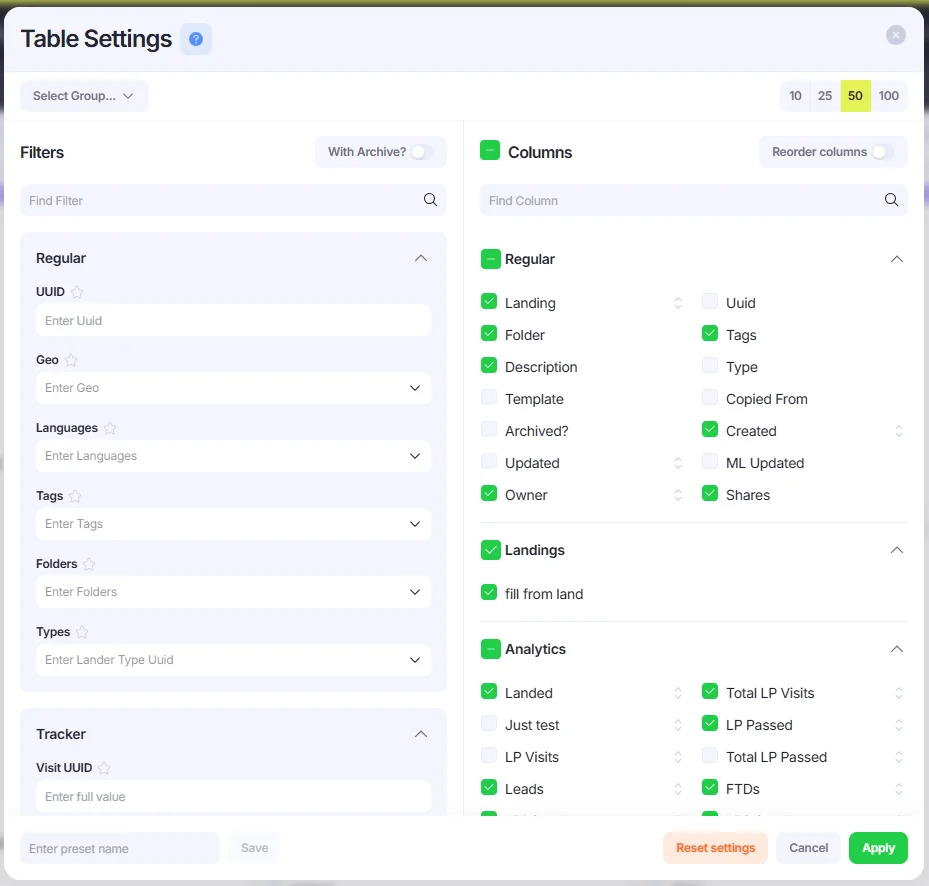
The Preset is a set of parameters used to show and filter table data in a specific format. Presets are created in the Table Settings window, where you can configure the filters and columns shown in the table.
This allows you to quickly customize the data view for entities like Campaigns, Landing Pages, Destinations, Sources, Visits, and more, helping you to organize and display the data according to your needs.
How to create Presets
There are two ways to create a new Preset.
1. Via the Table Settings.
- Go to the Table Settings pop-up window in the tab where you want to create a new Preset — such as Destinations, Sources, Landers, Visits, Conversions, or Domains.
2. Click the Presets menu in the top-right corner of the page, then click Table Settings.

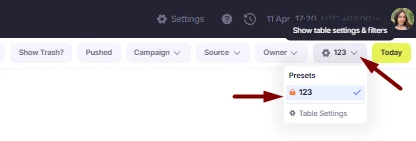
The Presets menu displays all the Presets available to the user. Any new Presets you create will appear in this list and can be applied to the table.
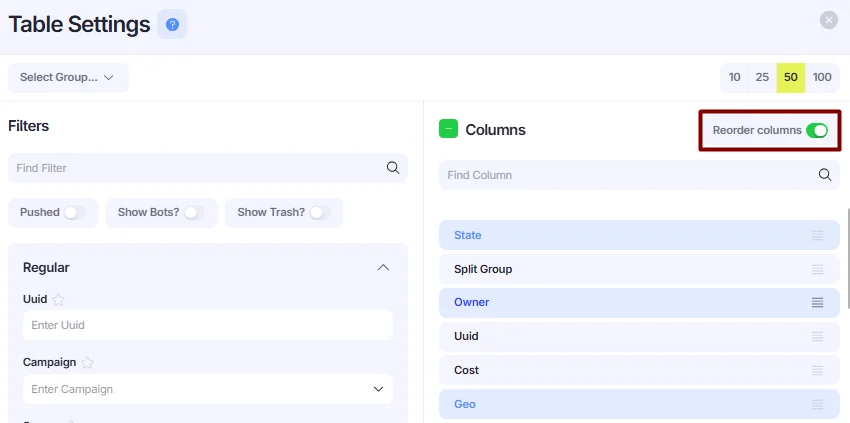
3. You will see the Table Settings window, where you can configure which filters and toggles will be applied, which columns will be shown in the table, and how many entities will be displayed per page. You can also use the "Reorder columns" toggle to rearrange the order of columns by dragging them into the desired position.
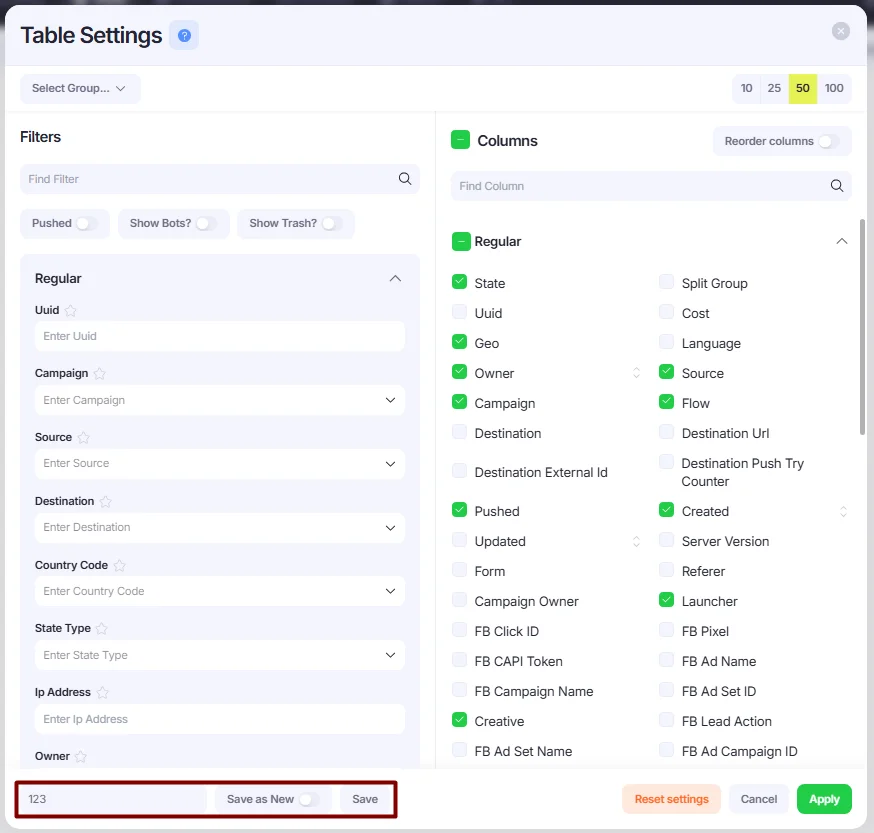
- After finalizing the desired Table Settings, enter the name of the new Preset in the "Enter preset name" field located in the bottom left corner of the window, then click the Save button. If you're modifying an existing Preset, you can either overwrite it or save your changes under a different name by enabling the "Save as New" toggle.
- Once you create and save a Preset, it will appear in the Presets tab and can be selected from the Presets drop-down menu.
2. Via the Settings-Presets.
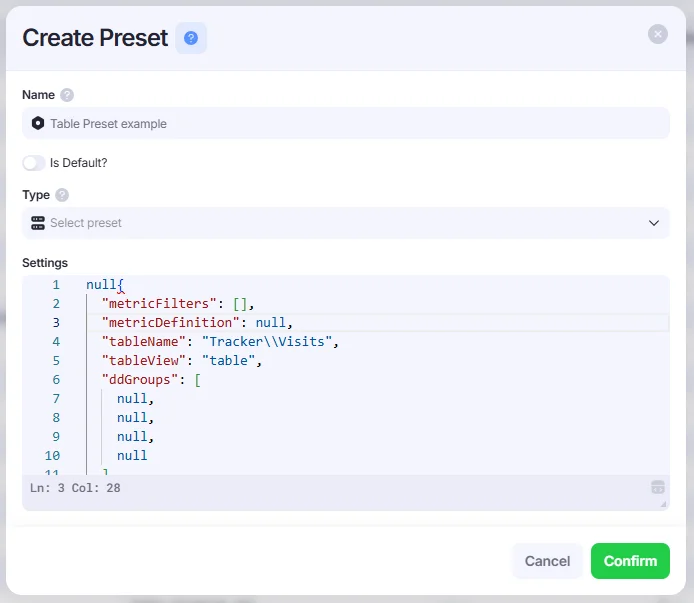
- Go to Settings → Presets. You will see the table with all existing Presets. Click the +Preset button to create a new one.

- You will see the Create Preset window, where you can enter the Preset Name, select the Type, and enable Is Default? toggle (which makes the Preset usable by default for all users), and enter the Preset’s code. Click the Confirm button to save the Preset.
Once you've created a Preset using either method, it will appear in the Settings → Presets table and can be selected from the Presets drop-down menu.