Set Up Positions, Teams, and Sharing
Introduction
With the Positions and Teams feature, users can create personalized workspaces for the team members, restrict or open access to different parts of the system, or create and assign users to different roles. In other words, users can customize access for each team member and show them only what they need to see.
The whole process of adding a user to the system, granting them positions, and assigning them to teams is as follows:
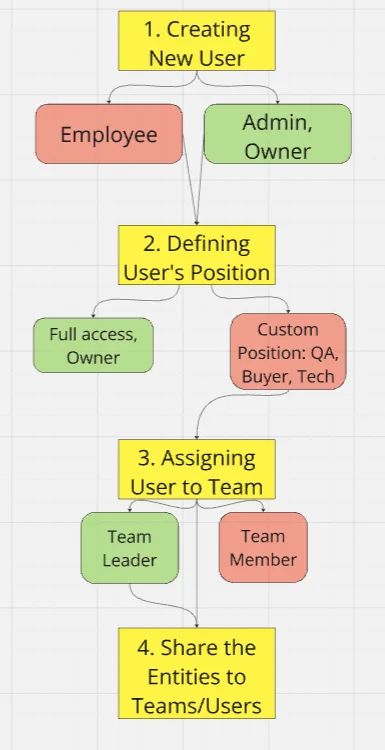
Users do not need to create custom positions or teams if it is not necessary. Some clients have only a few users with Owner or Admin roles, where each tenant member can see exactly the same information as the others. However, if you want to divide the Tenant between different users, the AIO Teams feature can help you do this.
Adding New Users
New users can be added either by contacting support (via the support chat or a ticket) or by inviting them to the system using an invitation link.
To add a user via link, go to Settings → Users and click the green +User button to create a new invitation.
For more details, refer to this guide: Invite New Users to AIO

If you contact support to add a new user, please provide the following information:
- User’s Telegram account
- Email address
- Full name
- The role to assign:
- Admin – full access to all entities and system settings
- Employee – restricted access; can only view entities shared with them
All your users can be viewed in Settings → Users section:

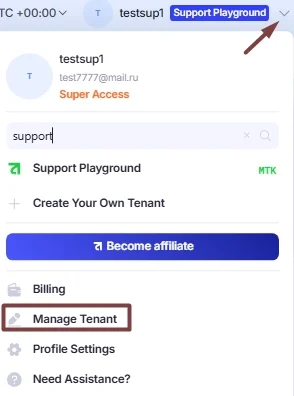
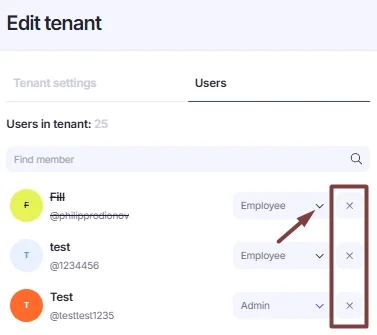
To change users’ roles or remove them from the tenant, open Manage Tenant → Users in the upper-right corner. This option is available only to users with Admin or Owner roles.
How to Create and Manage Positions
Once the user is added to your Tenant, they need to be assigned to a position.
- Click the Settings → Positions:

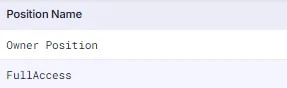
Full Access and Owner positions are usually preconfigured and provide full access to all parts of the system.
Other custom positions (QA, Landings Tech, Buyer, etc.) can be created by selecting only the parts of the system that employees should have access to.
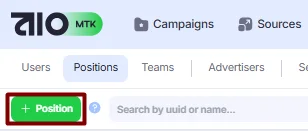
- Click the “+Position” to create a position:
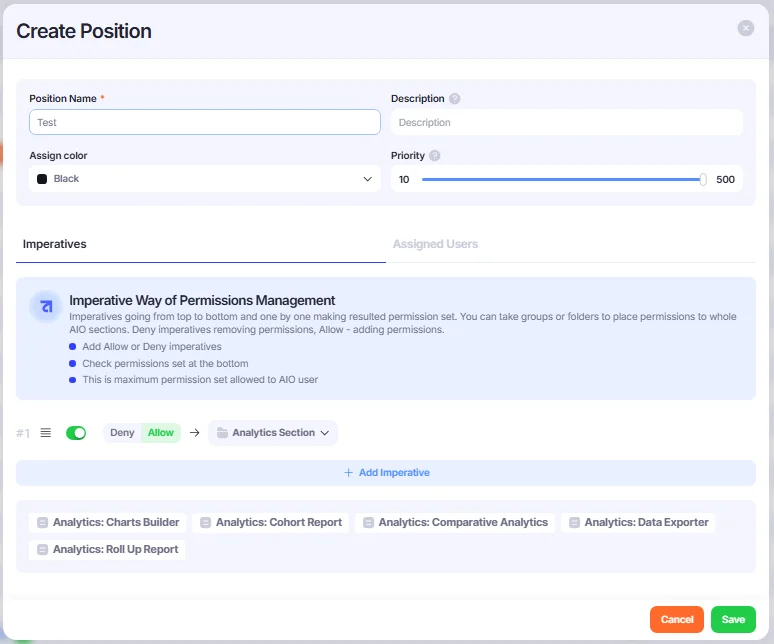
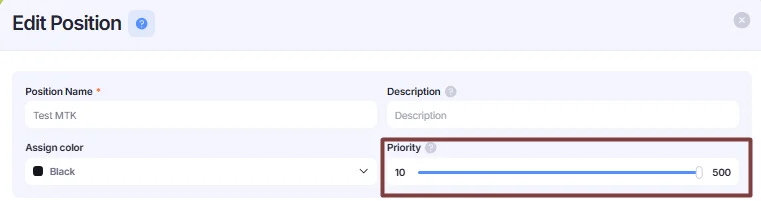
- Fill in the position details:
- Position: Enter a name for the position.
- Description: Enter a description, if needed.
- Assign Colour: Select a colour to make the position easier to identify in the list.
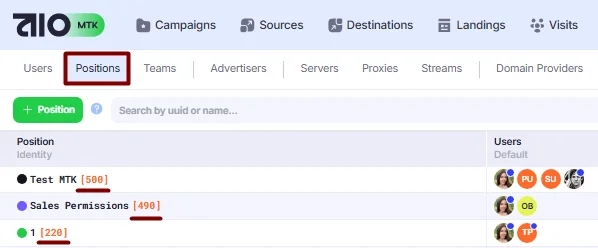
- Priority: Set the priority. This applies to users with multiple positions. If a user is assigned more than one position, the permissions with higher priority will override those with lower priority.
- Imperatives: Select the imperatives to be applied to this position. These can relate to specific parts of the system or entire sections, including editing permissions, scopes, or logs. You can learn more about imperatives in the Imperatives section.
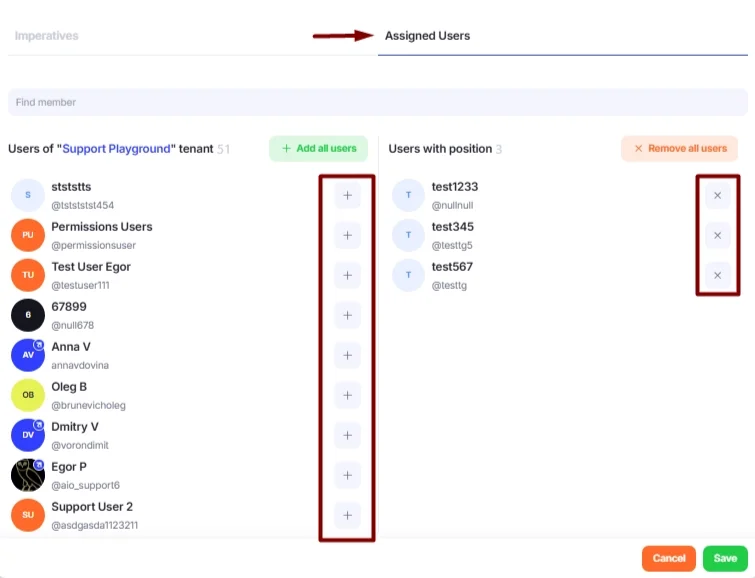
- Proceed to the Assigned Users subsection and add or remove users from the position:
- Click the Save button.
Imperatives
Imperatives represent the parts of the system that should be accessible or available actions. They can vary depending on the scope, ranging from broader scopes, such as entire sections, to more specific permissions, such as pages or only particular actions (like editing or sharing).
As you select the required imperatives from the drop-down list, they are applied from top to bottom, building the permission set step by step. The imperatives are listed in alphabetical order and include icons to help you identify their scope:
📁 Sections and Subsections, including all related permissions
📄 Pages (access to specific pages only)
⚙️ Actions (permissions for specific actions, such as Editing, Sharing, or Uploading)
🔗Show Logs (permission to view logs for a specific section or page)
🧿Scopes (view-only access to specific subsections and pages, including all their content).
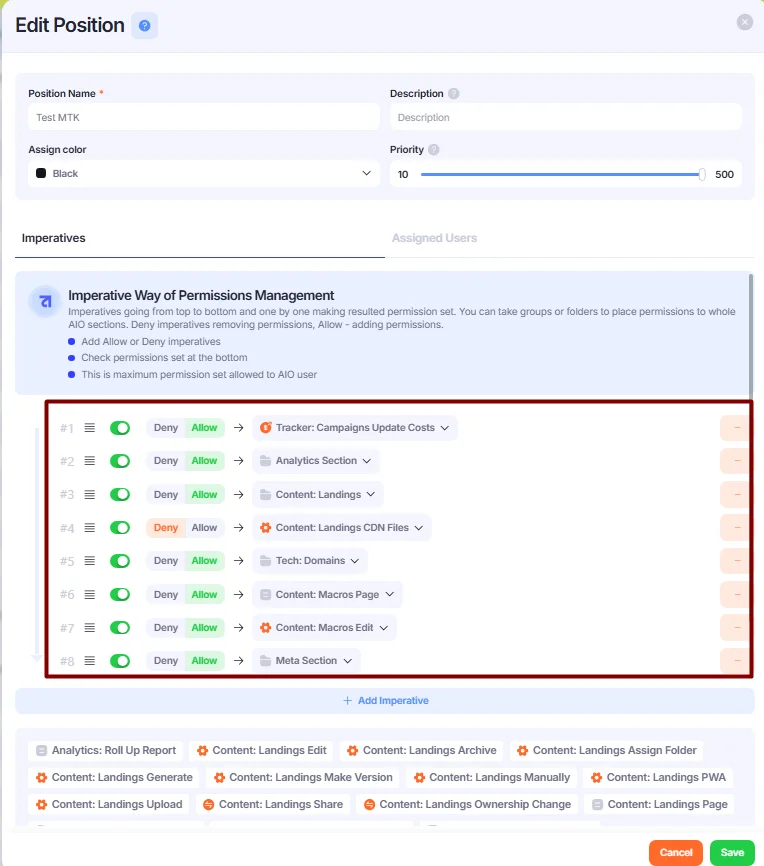
To build a Permission, select Imperatives one by one. The Allow/Deny toggle allows or denies each Imperative.

To remove an imperative from the list, click the ➖ icon on the right side of the window.

Imperative Types
There are several types of imperatives, ordered from the broadest scope to the most specific:
- 📁Sections: Provide access to entire sections (e.g., Analytics, Content, Meta). When you select a section, all its subsections are automatically included along with the full set of available permissions for that subsection, such as Sharing, Archiving, Editing, and Ownership Change, etc, depending on what is applicable.
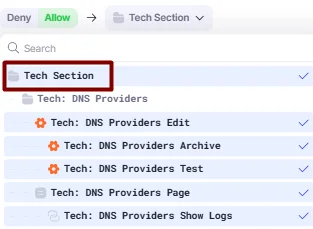
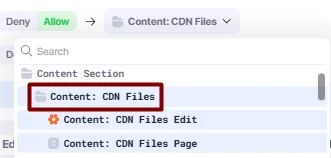
- 📁Subsections: Provide access to specific subsections within sections (e.g., Content: CDN Files, Content: Landings, Settings: Distributions). When you select a subsection, it automatically includes the full set of available permissions for that subsection, such as Sharing, Archiving, Editing, and Ownership Change, etc, depending on what is applicable.
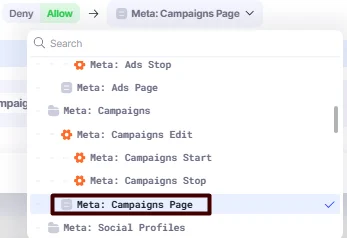
- 📄Pages: Provide access only to specific pages within sections and subsections (e.g., Content: CDN Files page, Meta: Campaigns Page, Content: Content Library Page). Selecting a page does not grant any additional permissions (such as Editing or Sharing) or access to other pages. This allows you to create highly specific and flexible permission sets.
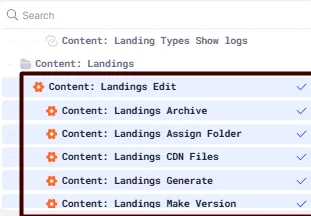
- ⚙️Actions: Grant permissions to perform specific actions, depending on what is available for the selected section, subsection, or page (e.g., Edit, Archive, Assign to Folder, Create Version, Upload). They can be used to build flexible permission sets by granting or restricting access to specific actions within sections, subsections, or pages.
They can apply at the section or subsection level (e.g., Content: Landings Edit, which grants editing access to all items within that subsection) or be selected as individual permissions for specific actions.
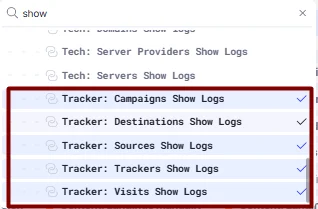
- 🔗Show logs: Grants access to view logs for a specific section or page.
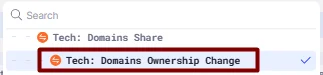
- 🔁Sharing and Ownership Change: Grants permission to share specific pages or change their ownership.
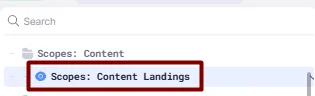
- 🧿Scopes: Grant view-only access to specific subsections and pages, including all their content. This can be used to provide access to certain positions (e.g., Finance) without sharing the entities, while still allowing them to view all available data in the section.
Multiple Positions
A single user can be assigned to different positions (for example, in one position, they have access only to the "Dashboard" section, while in another position, they have access to the "Tracker" and "Meta"). In this case, the user will have access to all three sections: "Tracker," "Meta," and "Dashboard”.
❗However, you should also consider position priority. If Position A with a lower priority (e.g., 10) grants a certain permission (e.g., Landings Edit), but Position B with a higher priority (e.g., 20) denies the same permission, the user will not be able to edit landings. This is because permissions from the higher-priority position override those from lower-priority positions.
How to Create and Manage Teams
While Positions open or restrict access to entire parts of the system, Teams can provide targeted access to specific entities, such as domains, campaigns, destinations, sources, and landings.
- Go to Settings → Teams:

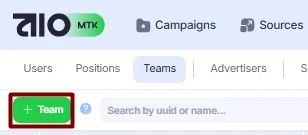
- Click the “+Team”:
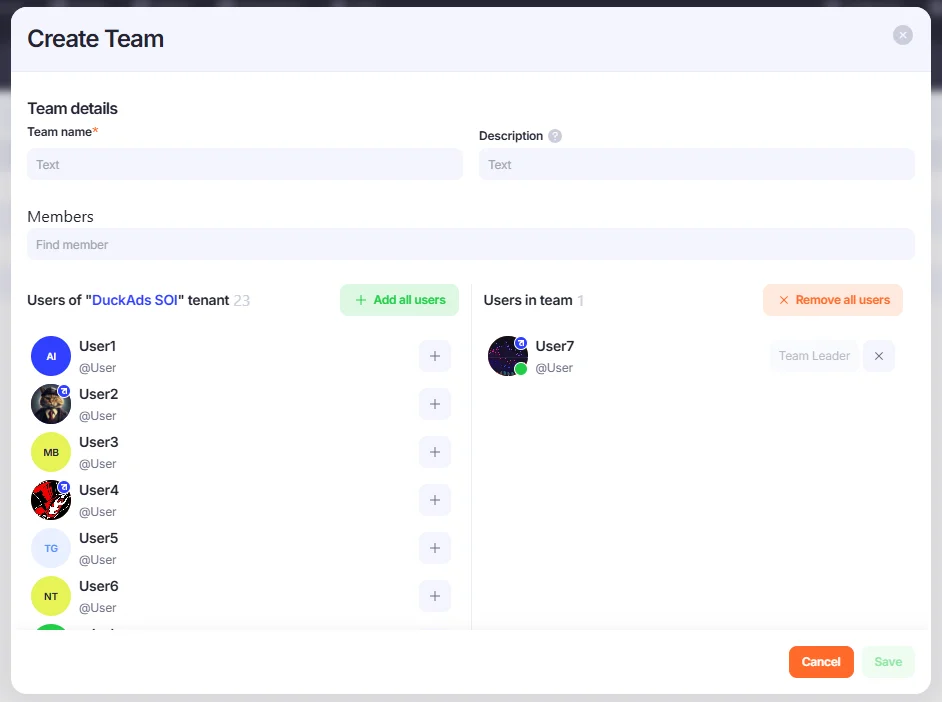
- Fill in the team details:
- Members: Select the people who need to be part of the team. These people can be assigned as Team Members, Team Leaders, or Team Heads. The person who creates the team is automatically assigned as the team head, but any number of additional team heads, team leaders, or team members can be added.
- Click the Save button.
Team Leaders, Team Members, and Team Heads
- Team Leaders: Can manage and share entities they have created, and view all shared and non-shared entities created by their Team Members or other Team Leaders.
- Team Members: Can manage and share entities they have created, but can only view entities that have been shared with them or their team.
- Team Heads: Can manage and share entities they have created, and view all shared and non-shared entities created by their Team Members, Team Leaders, or other Team Heads. Users with subordinate roles (Team Members or Team Leaders) do not have access to entities created by Team Heads.
Sharing and Changing Ownership
Sharing allows a user or team to access a specific entity. As mentioned before, Admins and Owners have a default rule that allows them to view and share any entity in the system, while Employees are restricted to sharing only the entities they have created.
How to Share Entities
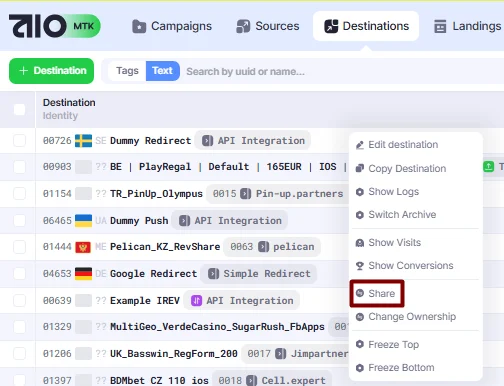
- Right-click the entity you want to share (for example, a Campaign or Destination). Select Share:
- Add the members or teams with whom you want to share the entity and, if necessary, add the editing permission (green pencil icon) or sharing permission (arrows icon). You can also share the entity with all members of the Tenant at once and give editing permission to all users with whom the entity is shared (”+Add all”, “All can edit”):
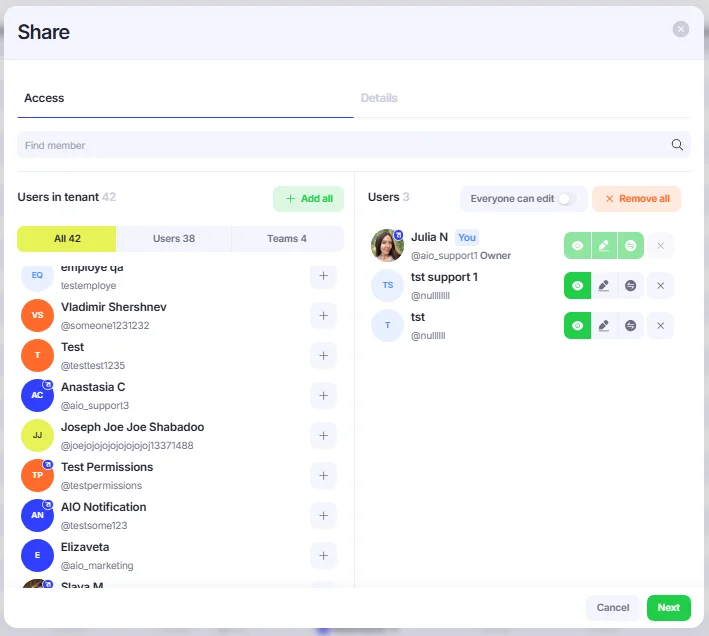
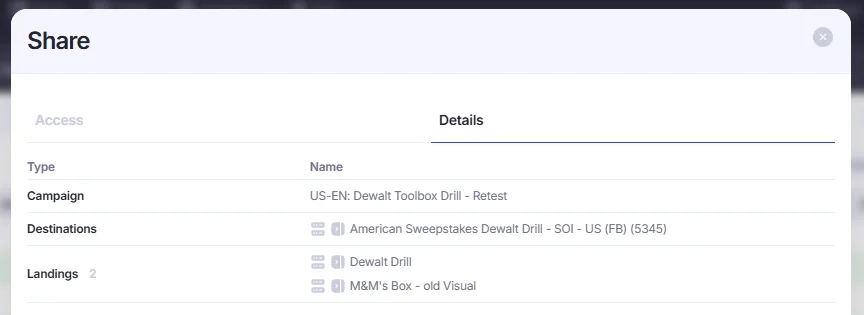
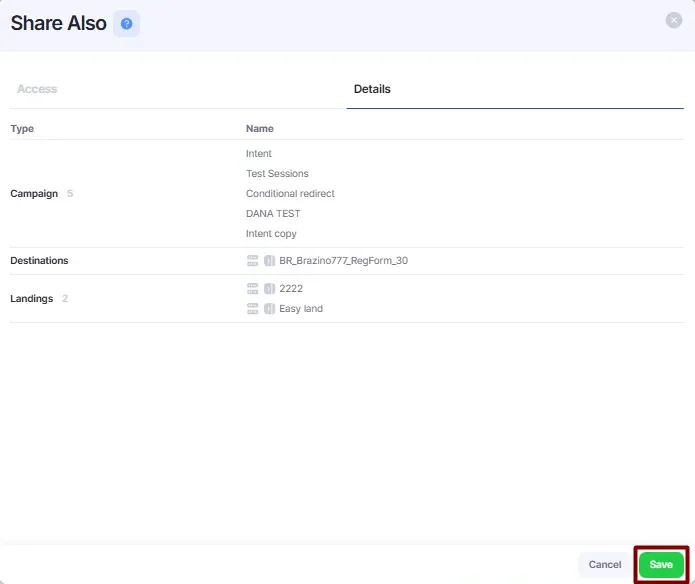
- Click “Next”. You will see a window indicating what else is being automatically shared with the campaign (Landings and Destinations used in this particular campaign). It is very convenient because there is no need to open and share all the entities associated with the campaign separately:
- Click the Save button.
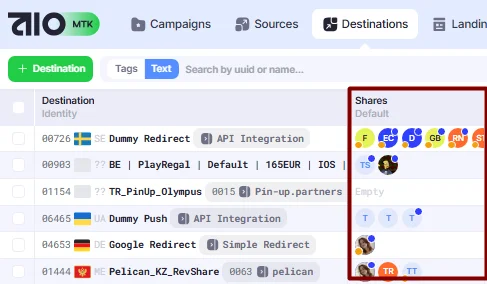
A single entity can be shared with multiple teams/users. You can view who the entity was shared with in the Shares column:
Mass Sharing
- Select a few entities you want to share by clicking a box, then right-click on one of them to open the actions menu.
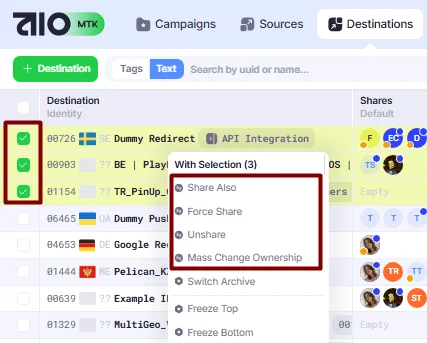
You’ll see the following actions: Share Also, Unshare, Force Share, and Mass Change Owner.
- Share Also — Default mass sharing option that allows granting access to a user or team for multiple entities. After selecting it, choose the user or team you want to share the objects with.
- Unshare — Mass unsharing option. Select the user or team you want to revoke access from.
- Force Share — Removes all previously shared users or teams and shares the selected objects only with the newly selected users or teams.
Example: Users Test User 1 and Test User 2 have access to several campaigns. After applying the Force Share action to Test User 2 and Test User 3, Test User 1 will lose access, Test User 2 will retain access, and Test User 3 will be granted access.
- Mass Change Owner — Changes the owner for multiple entities at once. Select the new owner for the chosen objects.
- Click the Save button.
How to Change Ownership
The owner in AIO is the person who created an entity (❗not to be confused with the owner of the Tenant — they have full access to any entities, no matter created by them or their employees). Ownership can be transferred to another user: for example, a QA specialist uploaded a landing, tested it, and then transferred ownership of the lander to another user who will later customize it and use it in the campaigns.
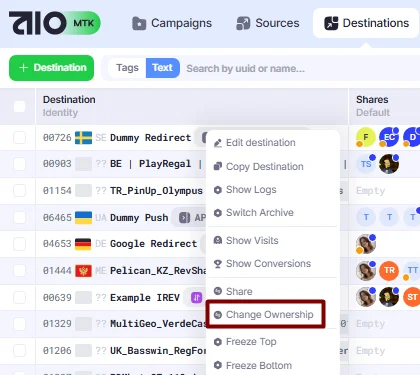
- Right-click on the entity (e.g., a Destination). Select Change Ownership:
- Select a new owner of the entity. Click “Confirm”.
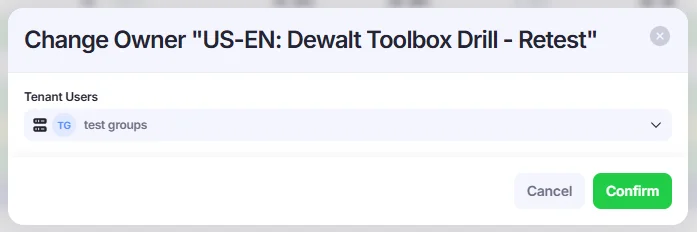
The original owner of the entity will still be able to see the entity, but only as a member with whom it has been shared, not as the owner.
Use Cases
Positions and Teams are very flexible and can help in various cases. We have described some cases that may help you find a quick solution and answer possible questions.
How to share a domain/landing with all users of the Tenant?
For example, you may have a few "public" domains, landings, or campaigns that should be shared with all your users, while all other "non-public" domains and campaigns should be kept hidden from everyone except their owners.
- Create a new team. e.g. “Public domains team”. Add all necessary users.
- Share the desired domains/campaigns/other entities with the team.
Why can't my employee see a domain/campaign/lander?
If a user can not see an entity while others can, it most likely has not been shared with them. Please double-check that the domain/campaign has been shared with all the necessary users/teams.
My buyer asks to share a landing with them. Who can help to share an entity?
- Users with the Owner/Admin role can view and share all entities in the system, whether they created them or not, as well as change ownership.
- The owner of the landing/campaign/any other entity can share it with others or change ownership and make another user the owner.
If a team leader adds a landing without sharing it with anyone, who will be able to view it?
If a team leader creates an entity without sharing it, team members will not be able to see it. It will be visible only to users with the Owner/Admin role, as well as to the person who added the entity and other team leaders of the team.
I added a new user and assigned them to the team, but the user can not get access to the CRM. Why?
Teams do not function independently without Positions as it breaks the logic; the system needs to understand which parts of the system should be accessible first. Therefore, you should assign the new user to a Position before adding them to a Team. So now you need to assign your user to a desired Position.